Entering Warranty Information
When warranty information needs to be included on an asset in OAKS,
that information is added using the Asset Warranties page. This job aid
outlines the process of adding warranty information to an asset.
- Agencies are not required to track asset warranty information in
OAKS AM.
Begin by navigating to the Asset Warranties
page.
Steps
- OAKS FIN > Main Menu > Asset Management
> Service and Maintenance > Asset Warranties
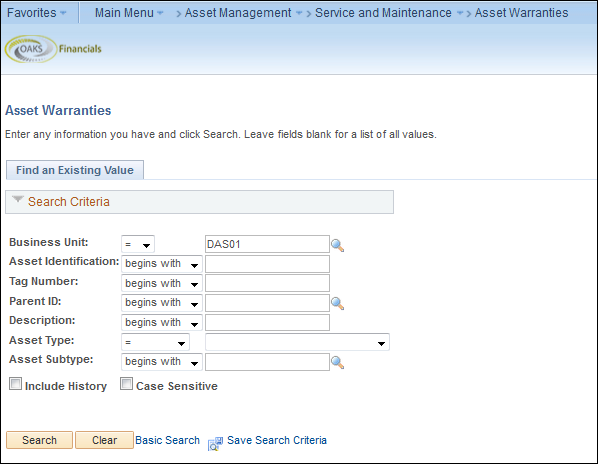
- Enter search criteria to locate asset (i.e. Tag Number).
- Click the Search button.
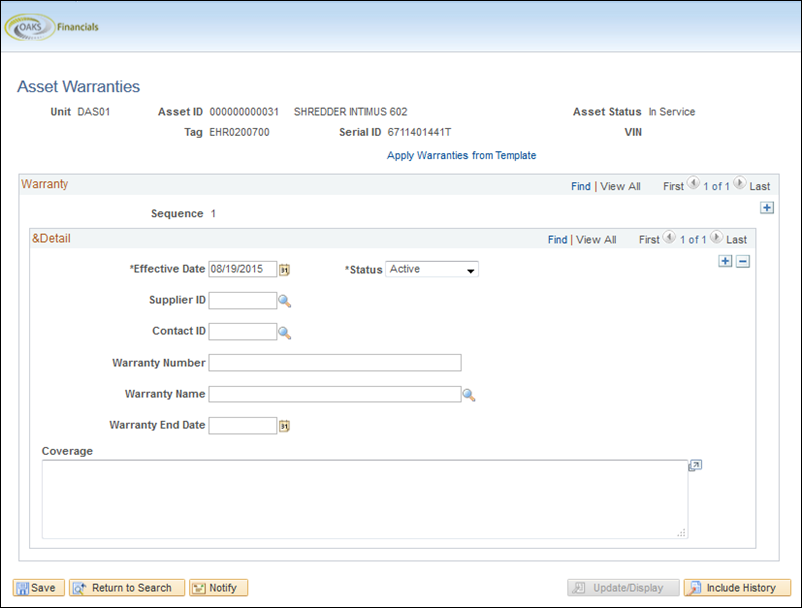
- Enter the Effective Date
– the date the warranty period begins.
- Click the Status field
dropdown.
- Select the status of a warranty.
- If the warranty is currently valid,
choose Active. Only Active or Inactive
statuses should be used.
- Click the Supplier ID look
up.
- Locate and select the Supplier
ID of the supplier responsible for the asset warranty.
- The supplier must already exist as
a state vendor in OAKS. If it is not, follow OBM Shared Services
guidelines for entering a vendor in OAKS.
- Click the Contact ID look
up.
- Locate and select the Contact
ID of the supplier.
- Click in the Warranty ID
field.
- Enter the Warranty Number.
- Click in the Warranty Name
field.
- Enter the Warranty Name.
- Enter the Warranty End Date
- the date the warranty period ends.
- Click in the Coverage field.
Enter additional notes, terms, and conditions of the warranty.
- Click the Save button.