Revised: 08/04/2023
Creating a Special Request Requisition
- ORC
126.07 – Certification of balance statements in all contracts.
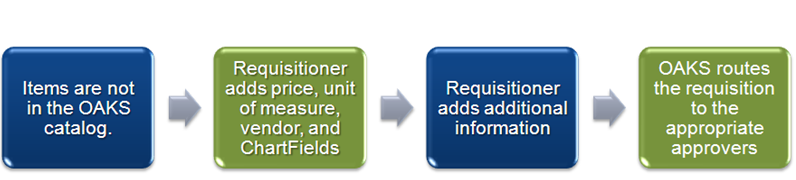
- Create a special request requisition when
- Requesting specific items that are not in the OAKS catalog.
- State Term Schedules (STS), One-Time Bids, and when using direct
purchase authority.
- For DAS one-time bids, agencies must create a requisition in OAKS
for a purchase that will be competitively bid and select State Purchasing
as the supplier. The requisition will be routed to DAS for approval.
DAS will update the requisition with the appropriate supplier and
the Contract ID.
- A requisition cannot be split coded between capital coding and
operation coding, nor can separate line items be set up for capital
and operational expense. Two separate POs will need to be created.
In this example, you need to place an order for certificates.
Step-by-step:
- Main Menu > eProcurement >
Requisition
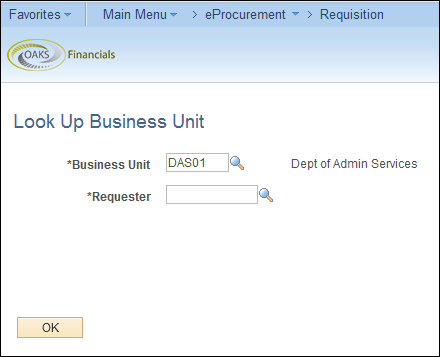
- Verify that your Business
Unit appears in this field or enter your Business Unit.
- In the Requester
field, enter the OH|ID Workforce
User ID of the employee requesting the items. You can also
click on the Lookup icon to
search for a requester by name.
- The requester cannot be the level
4 approver on the requisition.
- Click the OK
button.
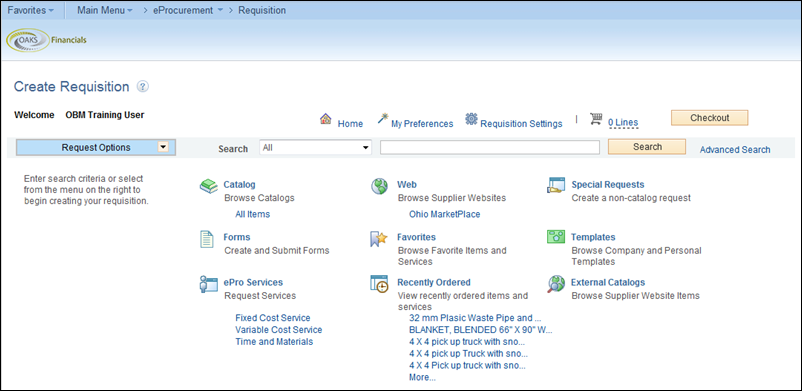
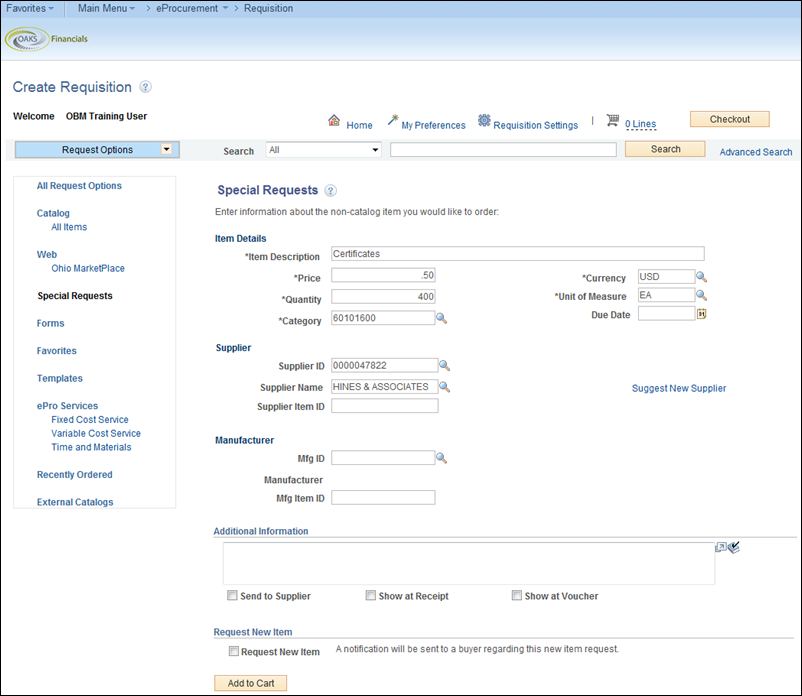
- Click the Special Request
link.
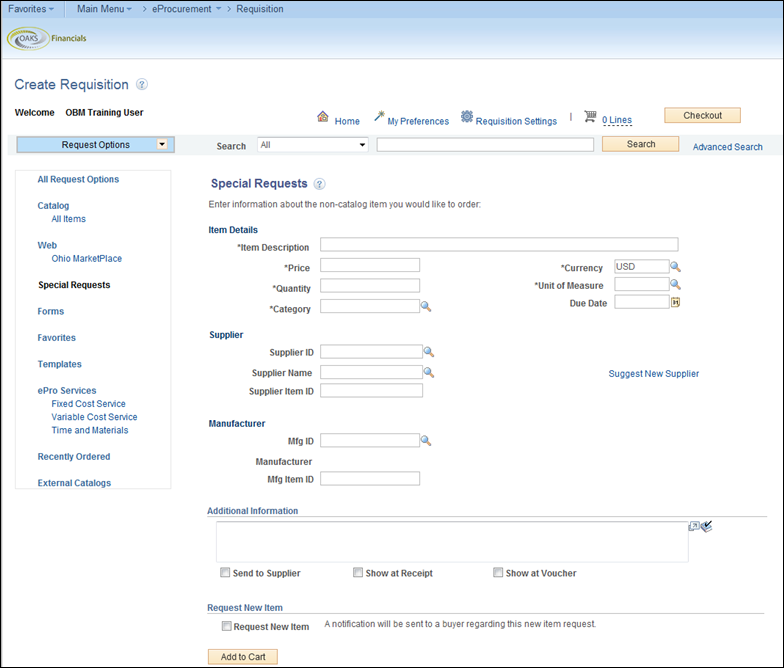
Enter the item’s description in the
Description field.
- Enter the item’s price in the Price
field.
- Verify “USD” is populated in the Currency
field.
- Enter the quantity of items to be purchased in the Quantity
field.
- Click the Lookup icon to
select a unit of measure. To have the purchase order liquidate by
amount select AMT as the unit
of measure. All other units of measure liquidate by the quantity.
- Click the category Lookup
icon to find and choose a category for this item. The
“Category” is the United Nations Standard Products and Services Code
(UNSPSC) for the item being purchased. You can also look these up
at www.unspsc.org.
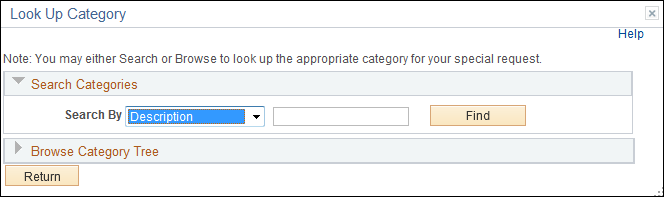
- Click to expand the drop down menu.
- Select Description
from the drop down menu.
- Type the items description into the Description
search box.
- Click the Find button.
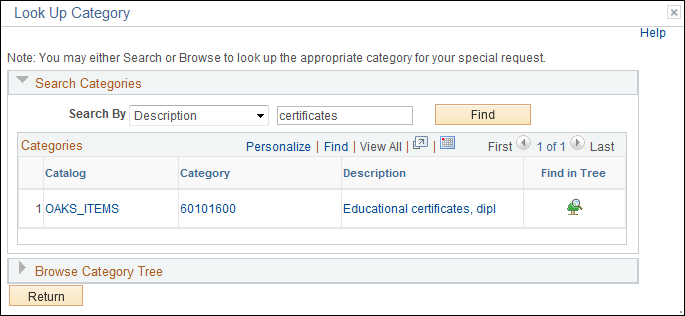
- Click the link to select the Category.
- Click the Lookup icon
 to find and choose
a Supplier ID for this item.
to find and choose
a Supplier ID for this item.
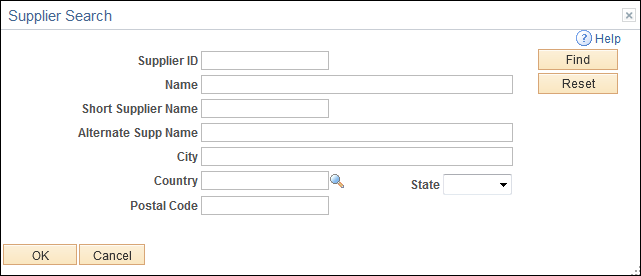
- You can search by any of the fields displayed on the Supplier
Search page.
- OAKS will display the results of the search. If the supplier you
need to purchase from is not in OAKS, you need to follow the appropriate
procedures for establishing a new supplier specified by OBM Shared
Services, a division of OBM: http://ohiosharedservices.ohio.gov/Suppliers.aspx
- Click the Add to Cart button
to add this item to the requisition.
- Notice that once you add the item to the requisition, it appears
in the Shopping Cart at the
top of the Create Requisition
page, next to Checkout.
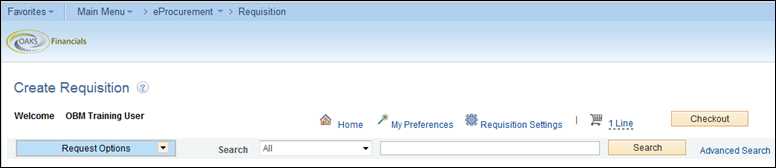
- Click the Checkout button.
The Checkout - Review and Submit
page opens.
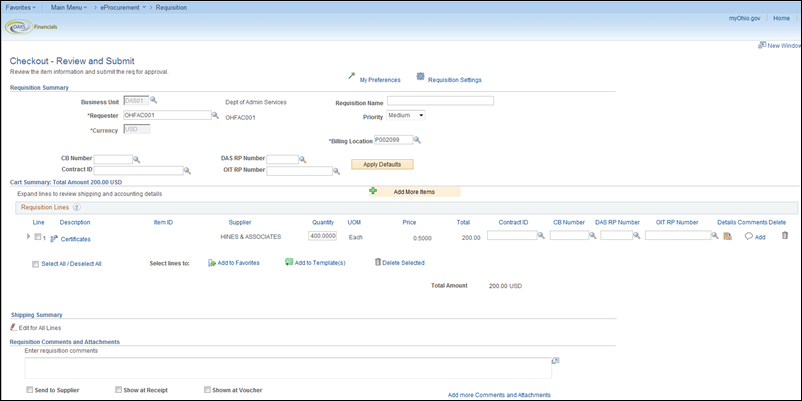
- The Checkout - Review and Submit
page allows you to enter header
information, ship to
information, accounting information,
and additional comments.
- Use the Billing Location
field to specify the location where the supplier should mail the invoice.
OAKS will automatically place a value in this field. You can change
it when necessary.
- If you are setting your requisition up
by amount (AMT) and not quantity
(QTY) scroll to the right and click on the Line
Details icon
 . The Line Details window
displays.
. The Line Details window
displays.
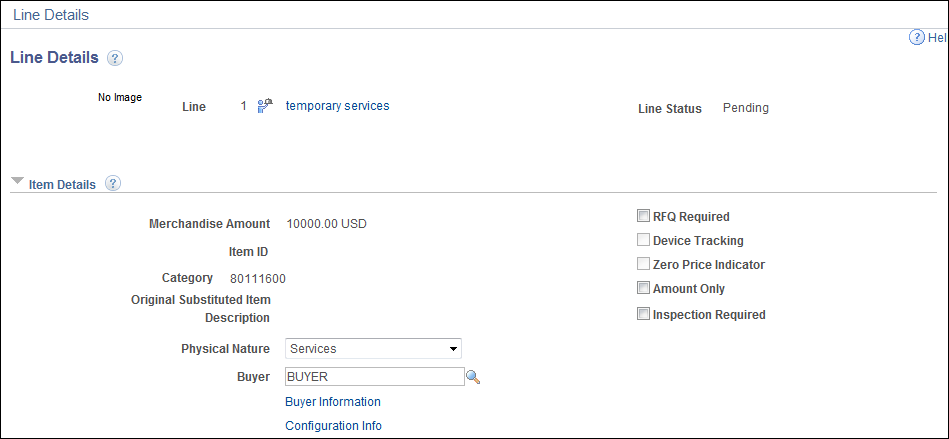
- In the Item Details section
select the Amount Only checkbox.
- Scroll to the bottom of the page.
- Click the OK button.
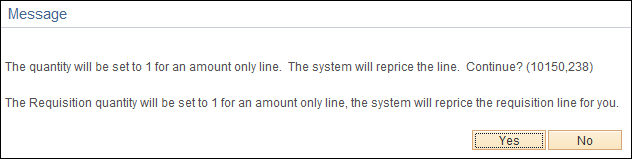
- Click the Yes button.
- Repeat for any additional lines as needed.
- Remember to update the price for varying price items. It is the
requisitioner’s responsibility to enter the correct current price
into the Price field if variable.
- Use the Justification/Comments
text field to enter additional comments about the requisition.
- If you want the comments to appear
on the printed purchase order, select the Send
to Supplier checkbox.
- If you want the comments to remain
visible only to approvers, do not select a checkbox.
- Now you need to add ship to and accounting information to the requisition.
- Click the Expand Section
icon
 .
.
If the selected
supplier has multiple addresses and the default supplier address is
not the address you would like to appear on the purchase order, this
information can be changed. On the Review
& Submit page, scroll to the far right and click the Line Details icon . Under the Supplier Information section, use
the look up icon by
the Add Seq field. This is
where you can choose from additional addresses for the supplier specified
on the requisition. For details on this topic, please view the Updating
the Supplier Address Sequence on a Requisition job aid.

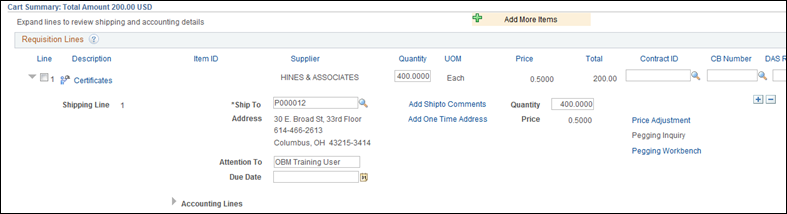
- Use the fields in the Shipping
Information region to specify:
- Ship To - Location
where the item will be shipped (required field). A default ship
to location will sometimes be populated, but can be changed if
necessary.
- Due Date - Date the
item needs to be received by (you can use this date when searching
for POs to create receipts against).
- Attention To - Name
of the person you want displayed on the shipment.
- You can have multiple Ship
To locations for an item on a requisition. This is covered
in Split Schedules and Accounting in Requisitions.
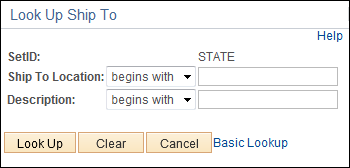
- If the Ship To location
is incorrect, use the Look Up
icon to
select a ship to location.
- Select the Description
drop down menu.
- Choose the contains
option.
- Type a portion of the location you are looking for into the
Description field.
- Click the Look Up button.
- Select the link for the desired location.
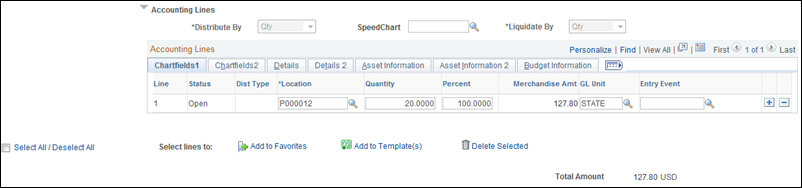
- The Distribute By and Liquidate By fields default to Quantity
(QTY). If your item is set up by amount, change these fields to amount
(AMT).
- Click the Expand Section
icon next
to Accounting Lines to continue
to enter the Accounting Lines.
- Generally, items should be purchased with a QTY UOM. This will ensure more efficient
use in the Receiving and Asset Management
modules.
- Click the ChartFields2
tab.
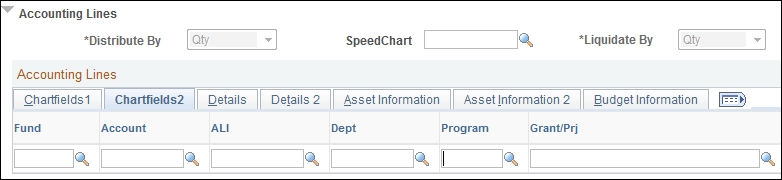
- There are five required
fields. Fill in these required fields:
- Fund
- Account
- ALI (appropriation line item)
- Department
- Service Location
Your agency may require you to enter
additional fields.
- A requisition with Capital coding (an ALI
that starts with ‘C’) cannot have additional line items or distribution
lines with operating coding.
- Refer to the OAKS ChartFields job aid for
a list of all the different OAKS Chartfield options and descriptions
of each.
- Click on the Asset Information
tab. If there are multiple line items, the Asset
Information tab will need to be reviewed on each line.

- Review the Profile ID
and Business Unit fields on
the Asset Information tab.
If the item is
an asset, be sure to verify that the Profile ID and Business Unit
fields contain the appropriate entries. If the item is NOT an asset
and a Profile ID and Business Unit are entered, delete
the information from those fields.
- Profile IDs for capital assets always end with the letter "C".
If the item being purchased meets the Capital Asset threshold, put
a C at the end of the Profile ID.
- Click the Select All / Deselect
All checkbox to select all the items on this requisition.
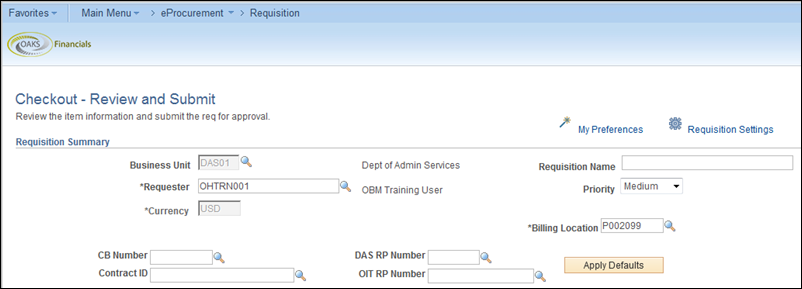
- On the Checkout - Review and Submit
page you can enter additional information for the requisition, such
as:
- CB Number (Controlling
Board Number): needed if you exceed the annual dollar threshold
per supplier set by the Controlling Board. A DAS RP is required
when entering a CB number.
- Contract ID: This should
fill in automatically if the item you request is attached to a
contract in OAKS. For special requests, you can add a contract
if applicable.
- DAS RP Number (DAS
Release and Permit Number): needed if you exceed the direct purchase
authority based on the goods or services set by DAS.
- OIT RP Number (OIT
Release and Permit Number): needed if you purchase IT goods/services.
- Use the Apply Defaults
button if you want to apply the CB Number, Contract ID, DAS RP Number,
or OIT RP Number to the selected lines/items on the requisition.
- If other requisition lines have different information for these
fields, you must enter the information on each line.
- Click the Save for Later
button.
- If you want to add the ad hoc approver
before the first agency approver, you need to click the Preview
Approvals button first so that OAKS does not automatically
submit the requisition to the first agency approver.
- Click the Preview Approvals
link.

- If you request an item that needs ad hoc approval (see ePro 215:
Approving Requisitions course), then you can specify the ad hoc approver
to go between any two approvers by clicking the Insert
Approver icon
 .
.
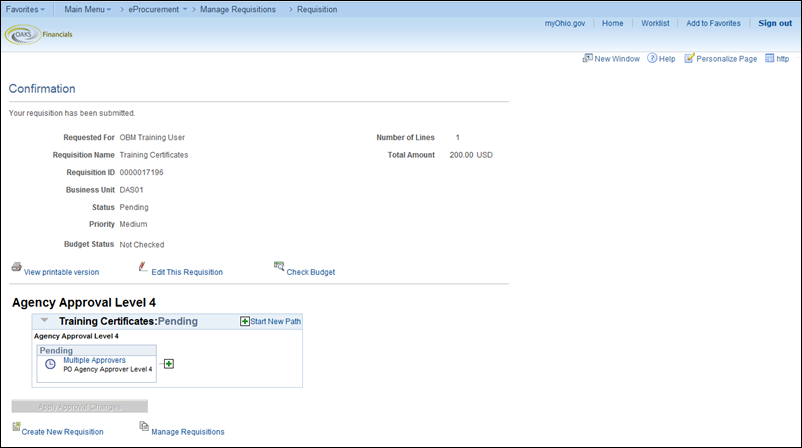
- After the requisition is submitted, OAKS routes the requisition
to the first agency approver.
- Notice that you can no longer select the Submit button and the
status of the approvers has changed. The first agency approval status
has also changed from "Initiated"
to "Pending".
- OAKS automatically routes the requisition for agency approval.
- If you are purchasing a copier, printing
service, vehicle or personal service, OAKS routes it to the appropriate
agency approvers and then to the appropriate central agency approvers
(e.g. DAS and OBM).
- If you want to view and print the information from your requisition,
you can use the View printable version
link.