Operating Budget Data Collection |
Revised: 07/19/2024 |
The Operating Budget Data Collection icon is in the Operating Budget tile and includes two forms:
- 121.E.Budget Data Collection-Expense - OPBud
- 121.T.Budget Data Collection-Revenue and Transfers - OPBud
On the 121.E.Budget Data Collection-Expense - OPBud form, users enter three years of operating budget expense data at the Fund, ALI, Account, and Initiative levels into the budget scenario (e.g., Bud A) specified in the guidance document.
The 121.T.Budget Data Collection-Revenue and Transfers - OPBud form, users enter three years of operating budget revenue and transfer data at the Fund, ALI, Account, and Initiative levels into the budget scenario (e.g., Bud A) specified in the guidance document. Note: A specific ALI is not required for every Revenue or Transfers line item.
NOTE: The following steps apply to the 121.E.Budget Data Collection-Expense - OPBud form. However, the steps are identical for completing the 121.T.Budget Data Collection-Revenue and Transfers - OPBud form (which will not be repeated in this job aid).
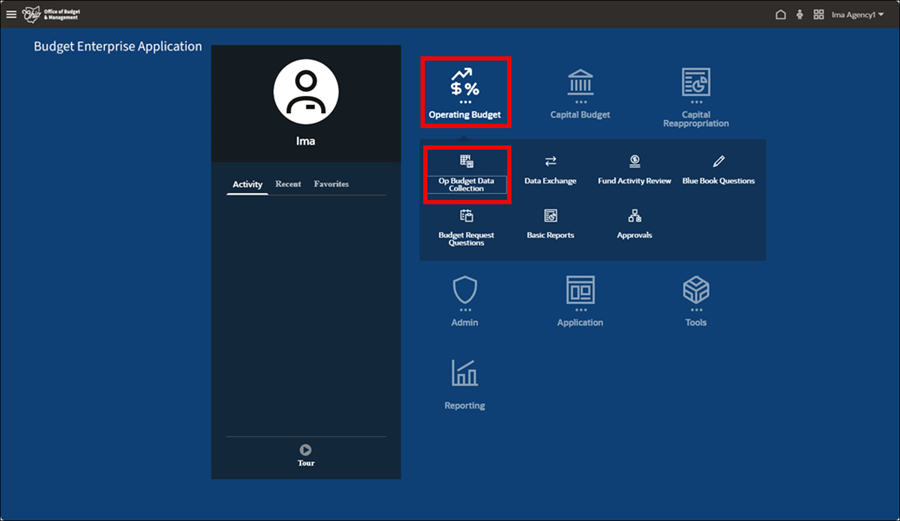
- Select the Operating Budget tile from the homepage.
- Select the Op Budget Data Collection icon.
- The 121.E.Budget Data Collection-Expense - OPBud page displays.
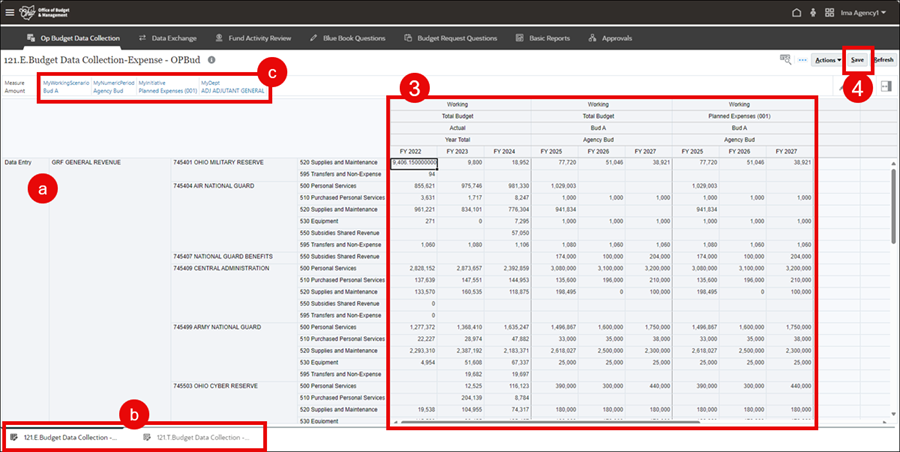
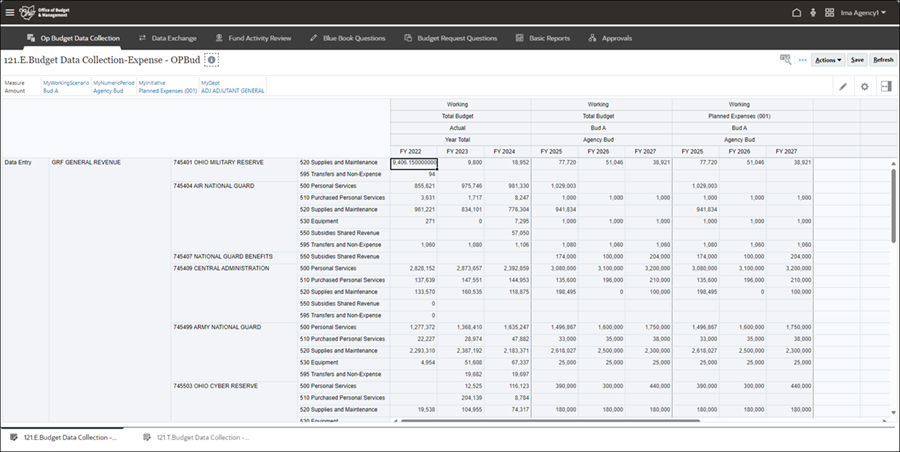
- Agencies will only see their Department data. The first set of columns display actuals, the second the aggregated Total Budget for the agency, and the third is for the selected lowest level entry (e.g., Planned Expenses (001)).
- The tabs at the bottom of the page indicate which form is displayed - Expenses, or Revenue and Transfers.
- The Point of View (POV) (located at the top-left) defines what the user sees on the form (e.g., ADJ's planned expense data for a specific budget scenario). To enter data, selections on the POV must be set to the lowest level available. For instance, on this form, MyInitiative cannot be set on the higher level of Total Budget, but rather at Planned Expenses (001) or Revenue and Transfers (002).
- There are two ways to manually enter data in both forms. The screenshots below depict using the 121.E.Budget Data Collection-Expense - OPBud form:
- Enter fiscal year amounts for current fiscal year and future operating expenses in the pre-populated intersections on the form. Projected Revenue and Transfer amounts are entered on the 121.T.Budget Data Collection-Revenue and Transfers - OPBUD form. Unsaved data are shaded yellow.
OR
- Add a line. The Add a line functionality is used if the Intersection (a different account, fund, ALI combination) is not already available on the form.
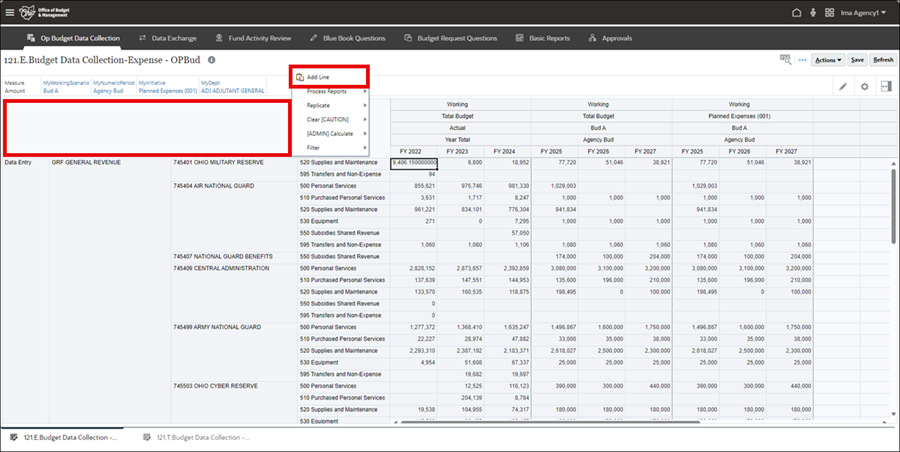
- To add a line, left-click in the upper-left cell to highlight the entire data entry area and then right-click for a menu.
- Click Add Line.
- The 121.Basic Form - Add Line pop-up displays.
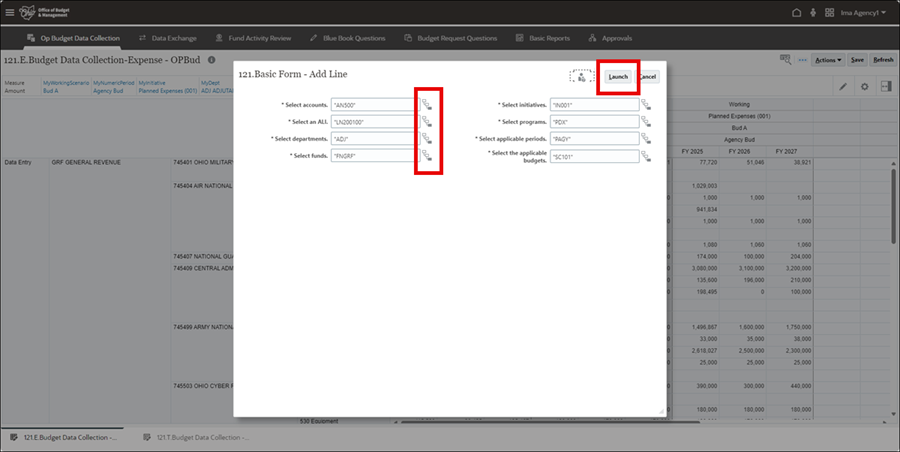
- Use the prompts and the Member Selector, which is accessed by clicking the icon to the right of each field, to add the intersection the user needs.
- Another option is to manually type the member value into the field. If manually entering, make sure to keep the prefix and quotation marks that are currently in the member selection box.
- Ensure each field reflects the correct information for the line being added and the agency the line is being added to.
- Click Launch.
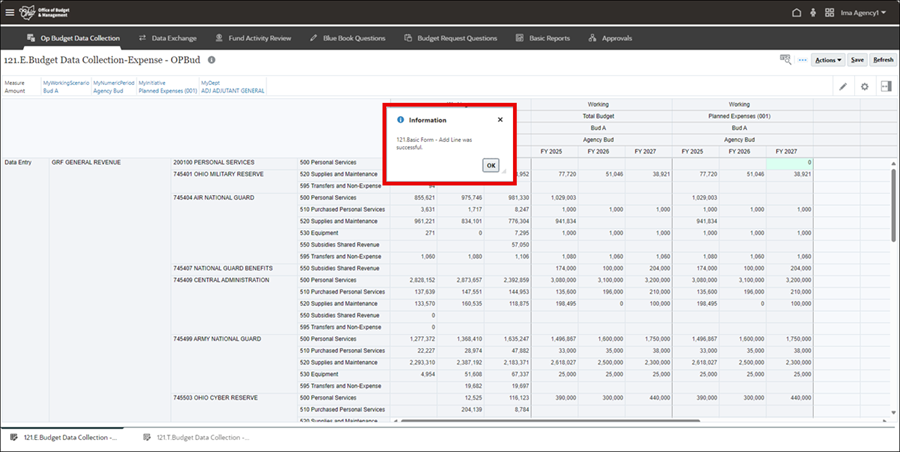
- Click OK for the Information pop-up. A green shaded cell in the far-right column indicates the new intersection.
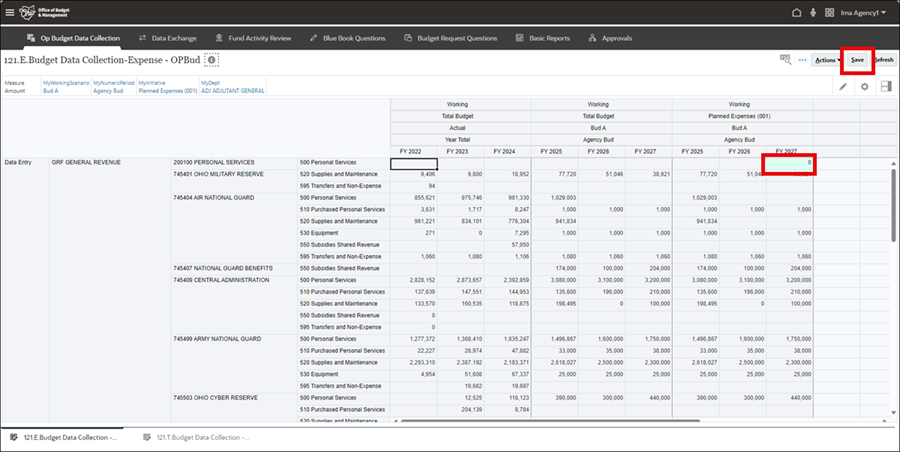
- Add budget data to the current and future fiscal years.
- Click Save.
- The Apply Combo Edits page displays.
- Clicking Save validates and aggregates the data. Combo Edits validate that the Department and appropriation line item combination entered is a valid combination in OAKS Financials.

- Click Launch to run.
- Clicking Cancel stops the combo edit validation but the data is still saved. Saving data without running combo edits may result in errors. Best practice is to run combo edits when saving.
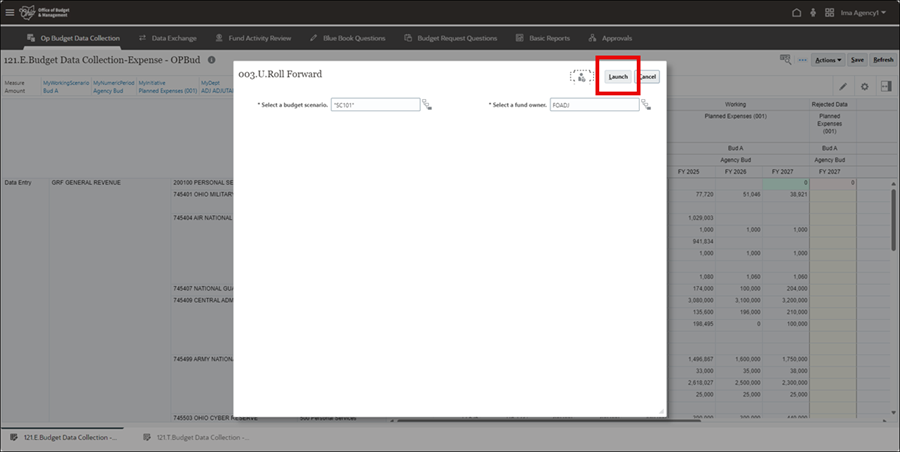
- The 003.U.Roll Forward pop-up displays.
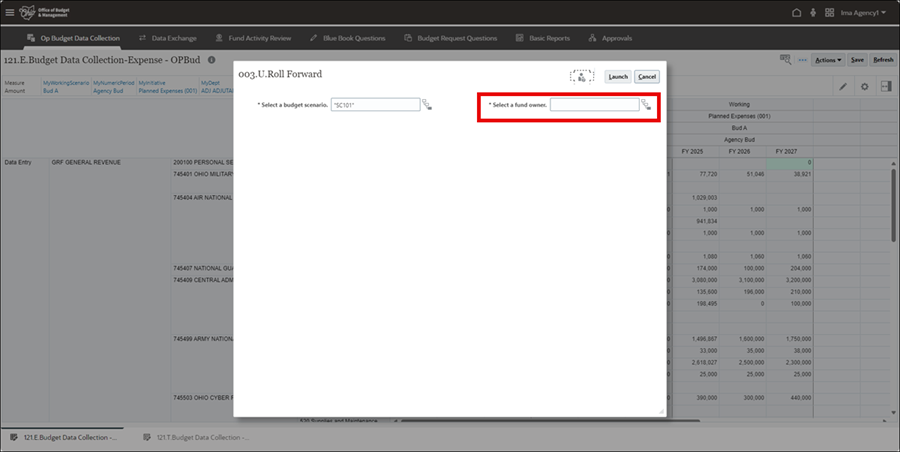
- The Select a fund owner needs to be selected using the Member Selector icon.
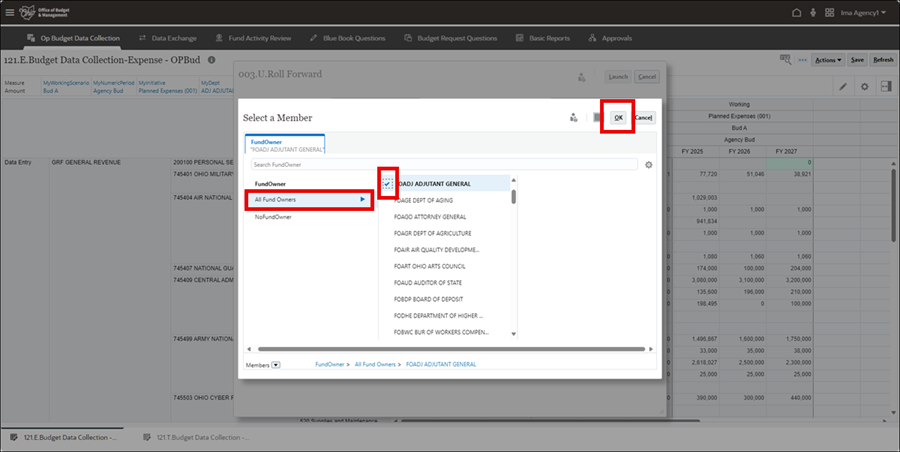
- Click the right-arrow for All Fund Owners.
- Click the checkmark next to the fund owner. (The checkmark will turn a solid blue.)
- Click OK.
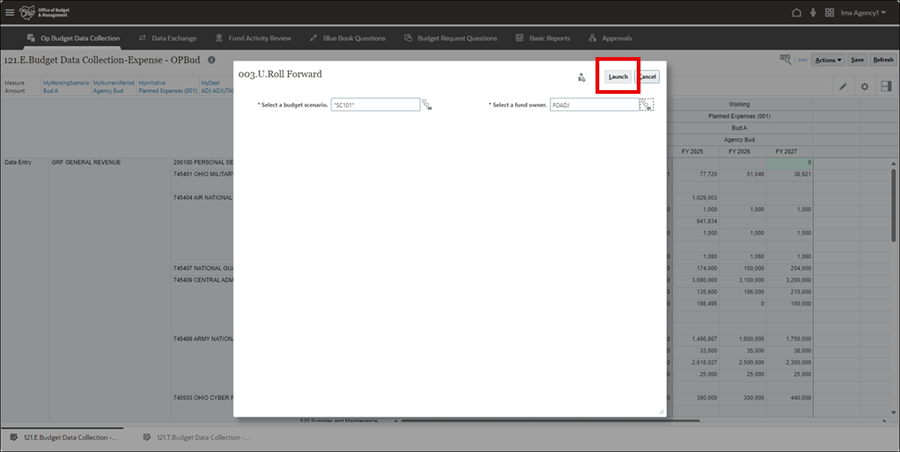
- Click Launch.
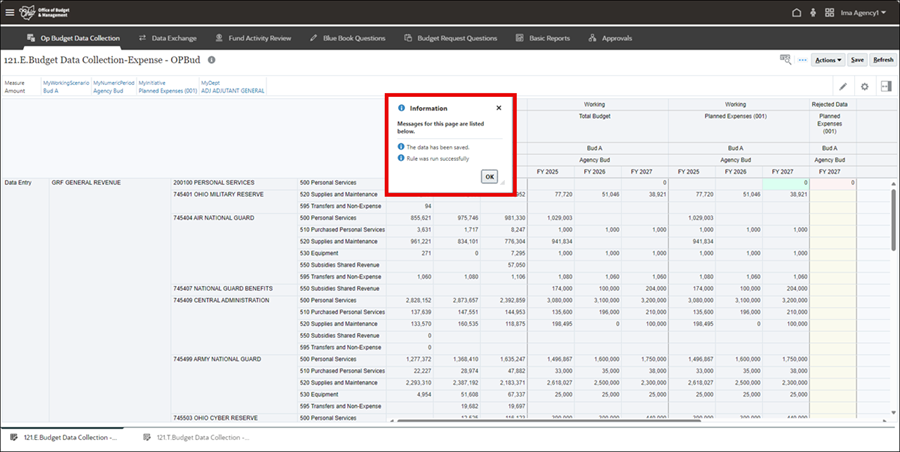
- Click OK for the Information pop-up.
- Ensure combo edits ran successfully.
- A Rejected Data column displays if an invalid combination exists.
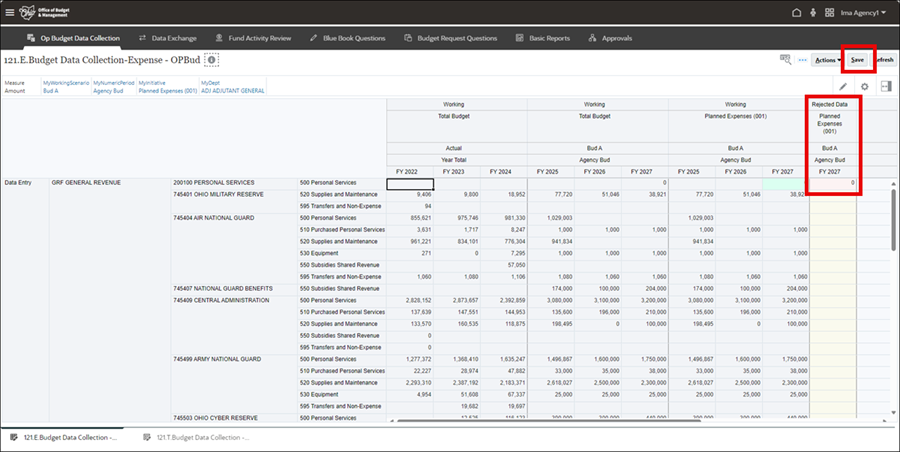
- Revise data as needed by entering correct data (repeat from step 3) and delete dollar amounts from the Rejected Data row.
- Click Save after entering correct data.
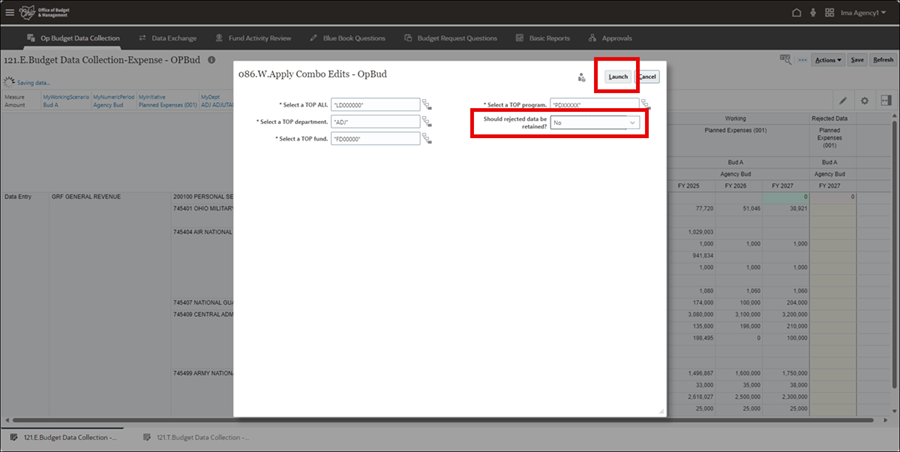
- Select No under Should rejected data be retained? to remove rejected data.
- Click Launch.
- The 003.U.Roll Forward pop-up displays.
- Click Launch.
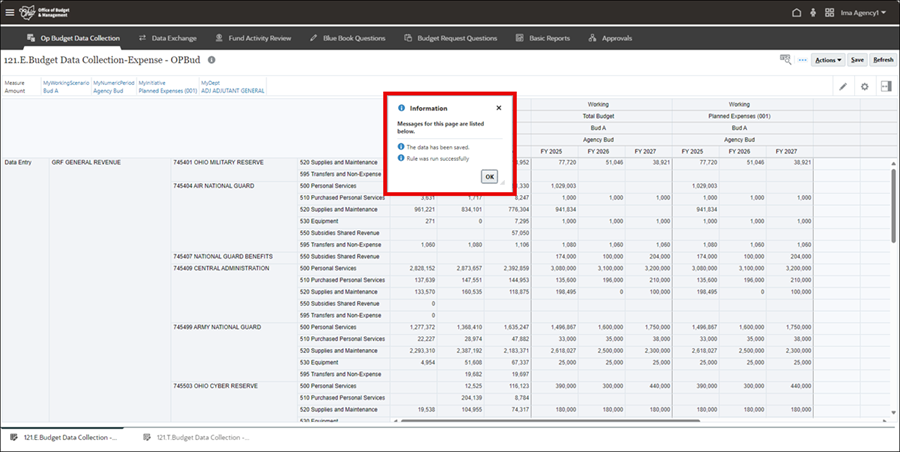
- Click OK for the Information pop-up.
- Verify data accuracy.