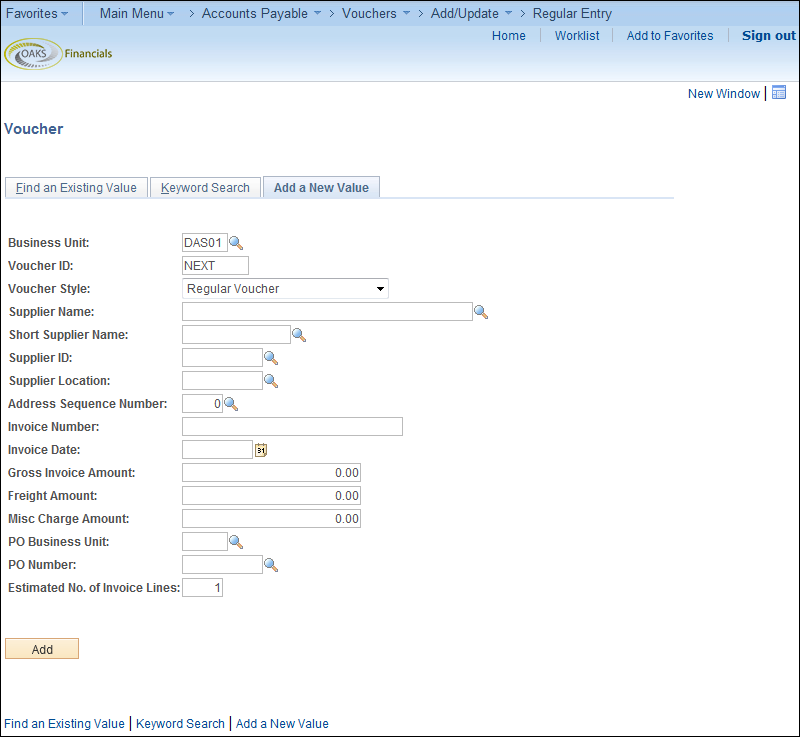
Revised: 03/06/2019
Journal vouchers are created when distribution information needs to be corrected on any current fiscal year voucher that has been posted and paid.
If a posted voucher references a purchase order, whether paid or not paid, a Journal Voucher will correct ChartField entries on the voucher, but the purchase order will not be affected. For example, if the distribution line did not contain a grant number or if the department used on the PO was incorrect, a Journal Voucher can be created to make the corrections.
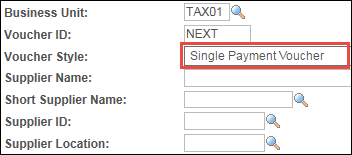
A Journal Voucher is a $0 voucher used for re-classification purposes only.
Problem |
Cause |
Solution |
While creating a journal voucher a "No matching values were found" message displayed. |
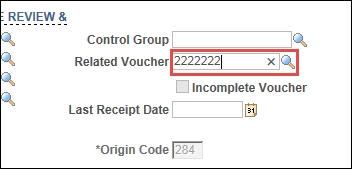
Attempting to enter the related Voucher ID before the supplier ID will produce the error message. |
Enter a supplier ID before the Voucher ID when creating a journal voucher. |
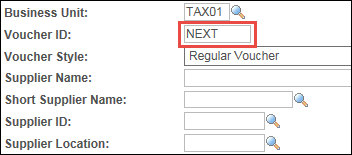
While creating a journal voucher for Single Pay suppliers – Related Voucher look up is blank. |
Journal Vouchers cannot be created for Single Pay Vouchers. |
Create a CRM case to request an update to supplier ID and Voucher ID Related. |
When attempting to save the journal voucher, an error message displays: “The sum of the cash distribution lines for invoice line number 1 is not equal to zero.” |
The amount sum of all the cash distribution lines on a journal voucher must net to zero. |
Close the error message, correct the amounts, and then re-save. |
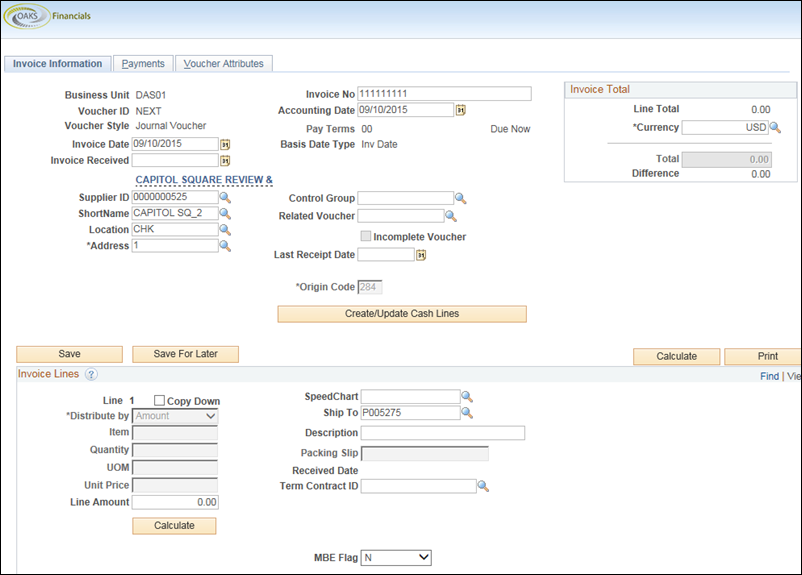
 dropdown list.
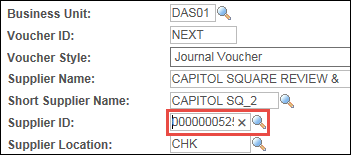
field. Only OAKS FIN assigns IDs to vouchers.
whose records that are being corrected.
to select the number so that OAKS FIN
populates the Name, Location,
and Address fields.
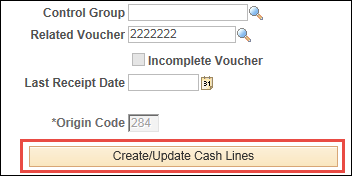
before entering the related voucher
ID. If the voucher ID is entered first, an error message "No
matching values were found" will display.
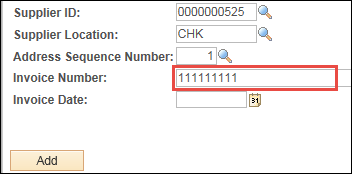
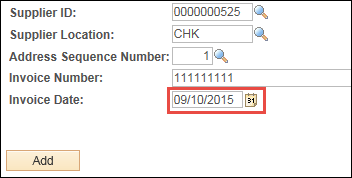
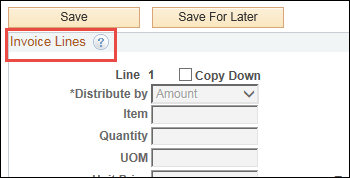
in the Invoice Number field.
field.
.
dropdown list.
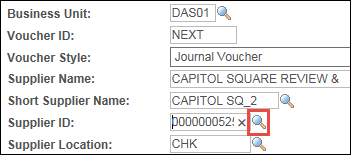
field. Only OAKS FIN assigns IDs to vouchers.
whose records that are being corrected.
to select the number so that OAKS FIN
populates the Name, Location,
and Address fields.
before entering the related voucher
ID. If the voucher ID is entered first, an error message "No
matching values were found" will display.
in the Invoice Number field.
field.
.
 field.
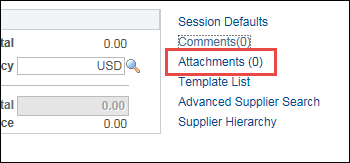
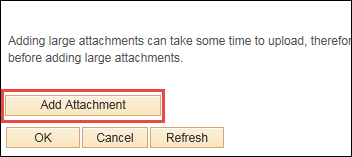
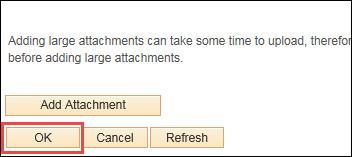
link to add documentation.
.
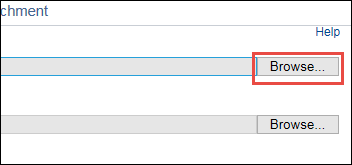
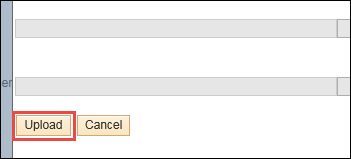
for and select the attachment.
.
to verify that this is the correct attachment.
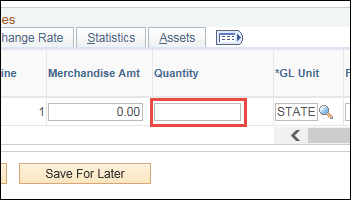
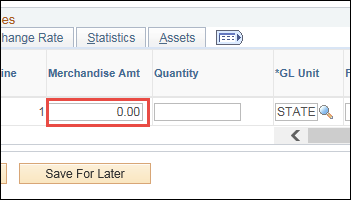
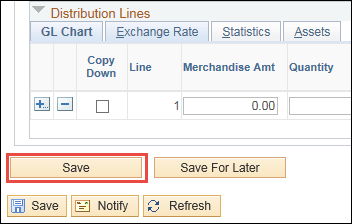
and Quantity
fields should be listed as negative
numbers.
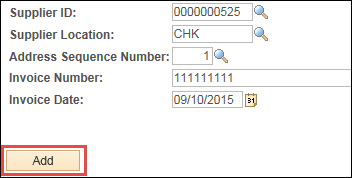
button to add another row.
.
button.
.
link on the Invoice
Lines header bar (if necessary) to
see all lines.
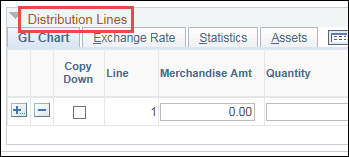
link on the Distribution
Lines header bar (if necessary) to
see all lines.
on each Distribution Line falls
in the same fiscal year as the original voucher.
field.
field.
link to add documentation.
.
for and select the attachment.
.
to verify that this is the correct attachment.
and Quantity
fields should be listed as negative
numbers.
button to add another row.
.
button.
.
link on the Invoice
Lines header bar (if necessary) to
see all lines.
link on the Distribution
Lines header bar (if necessary) to
see all lines.
on each Distribution Line falls
in the same fiscal year as the original voucher.