Revised: Variable "PUM2024_RevisionDate" is not defined
Direct Journals are used to record miscellaneous cash receipts. They are not associated with any pending item or customer account. OAKS FIN posts these transactions directly to the General Ledger after processing by Budget Check and Journal Generator. Revenue is recorded and the agency‘s budget increases when the deposit is processed in OAKS FIN. Accounting entries are manually created for direct journal deposits. The direct journal accounting entries must be marked “Complete” and be saved before they will post to the General Ledger.
If an agency specifies a customer ID, AR records the collected cash revenue in the customer‘s record, but does not apply it to any pending items. There is no effect on customer pending items or balance.
OAKS FIN calls collected cash revenue “miscellaneous cash receipts.”
Direct Journals can also be used for Buy-Backs and Customer Refunds.

Enter "STATE" in the Bank Code field.
Enter the actual deposit date in the Acctg Date field.
Enter the Deposit Type.
B – Buy-Backs for returned checks.
X – Customer refunds (deposit modifications).
Enter the total dollar amount of all direct deposits that will be entered as part of this group in the Control Total Amount field.
OAKS FIN uses the Totals field areas to verify that all items have been entered correctly and that the group is in balance.
Enter the total number of direct deposits that will be entered as part of this group in the Count field.
Click the Payments tab.
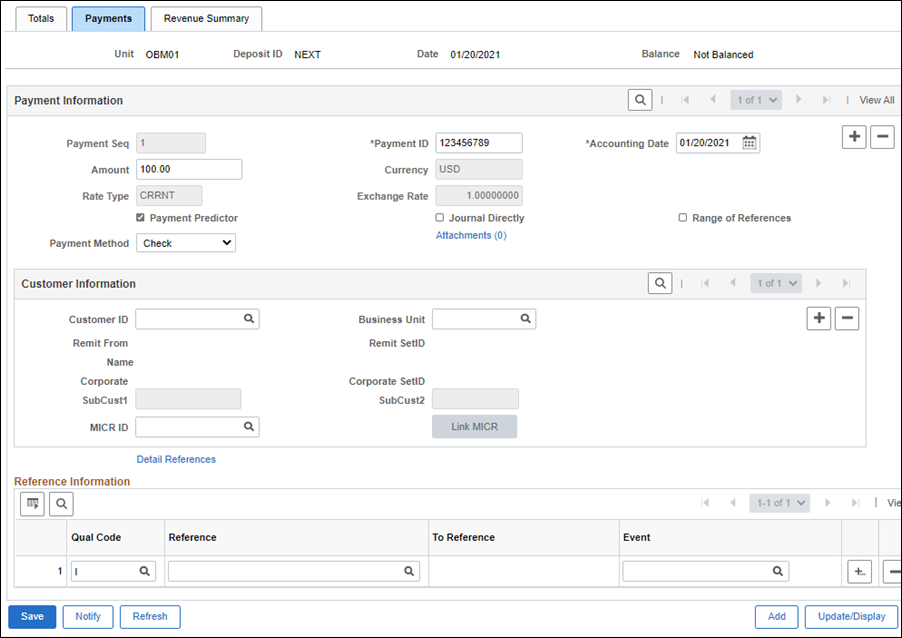
Enter the check number in the Payment ID field.
If the payment is cash, enter "Cash."
Enter the Amount of the deposit.
Click the Journal Directly checkbox.
Enter the Payment Method .
The options are:
Check
Cash
Electronic Fund Transfer
Giro - EFT
Click the Add a New Row icon to add another payment.
Enter other payments using steps 14-17 as necessary.
Click Save.
OAKS FIN creates a Deposit ID for the batch.
Make a note of the Deposit ID for later use.
Verify that the status in the Balance field is "Balanced."
If it is not, check the entries for accuracy.
Click the Totals tab.
Verify that the Difference Amount field and Count field in the Totals area both equal "0.00."
If they do not, check the entries for accuracy.

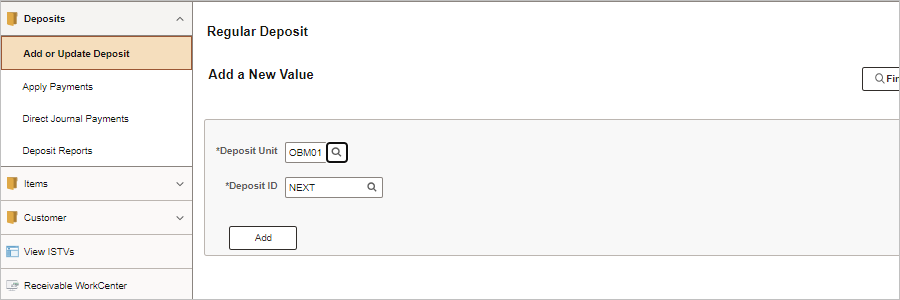
Verify that OAKS FIN correctly populated the agency's Business Unit code in the Deposit Unit field.
Enter the Deposit ID .
When navigating directly from entering the deposit, the Deposit ID field will display the generated deposit number.
Click Search.
The Search Results display a list of all payment items entered for this deposit ID.
Click the first item in the Search Results table.
If there is a single item for the deposit, that item will display (rather than a list).
The first item in the deposit displays.

Enter the ChartFields distribution for the deposit, including at least the Fund, Department, and Account fields.
OAKS FIN will create the offsetting cash entries.
OAKS FIN validates the ChartField values to verify that they work as a combination. If they do not, an error message will appear when trying to save.
Enter the credit to revenue in the Line Amount field using negative numbers.
Alternately
Click the look up icon next to SpeedChart Key.
Select a Key from the Search Results list.
Click Add Distibution Line .
The ChartFields automatically populate based on the Key selected, including the line amount.
Refer to the "SpeedChart Process" topic for assistance with creating or modifying SpeedCharts.
Click the Create icon to automatically create the offsetting cash lines.
Review the revenue line to verify that the Total Debits and Total Credits net to zero.
Click the Complete checkbox to mark this item as ready to post.
Click Save.
Repeat steps as necessary for additional deposits.
| Click here to request updates to this topic. |
|