Revised: 10/07/2024
Creating Reason Codes
Overview
Every receivable transaction entered into or generated by the system must have an Entry Type and Reason code. The Entry Type categorizes pending items that will create or update posted items within the system. Examples of Entry Types are invoices, ISTVs, payments, debit memos, credit memos, and overdue charges.
Reason Codes are paired with Entry Type categorizations to define the ChartField strings used to specify the account to/from which money should be credited/debited. Multiple Reason Codes may be available for each Entry Type.
Depending on the budget or agency needs, new ChartFields may be created. When this occurs, Reason Codes must also be added. This topic serves as a guide for creating reason codes. For ChartField actions refer to Creating and Maintaining ChartFields.
- AR Administrator or
OH_AR_CFCODE_CONFIG security
role(s) is needed to follow the following steps.
Steps
Create Reason Codes for the Associated Credit and Debit Types
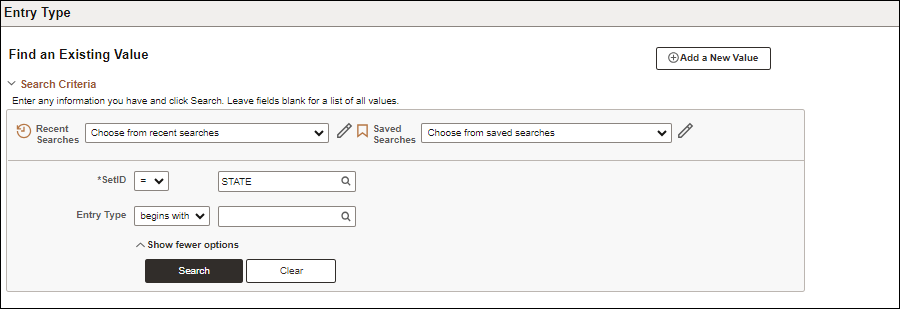
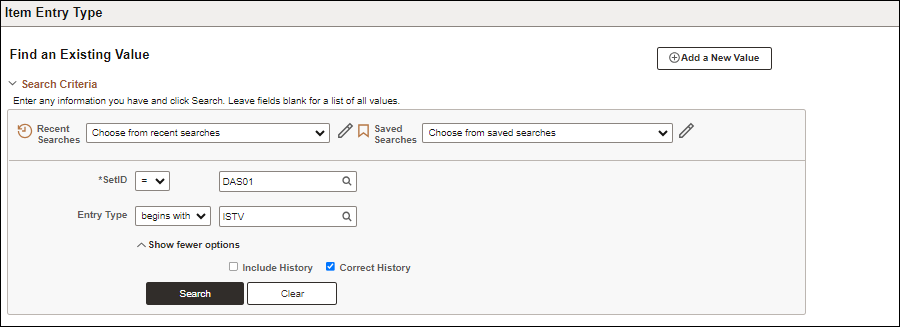
- Enter the agency specified Business Unit code in the
SetID
field.
- Enter the Entry Type in the
Entry Type
field.
- Click
Search.
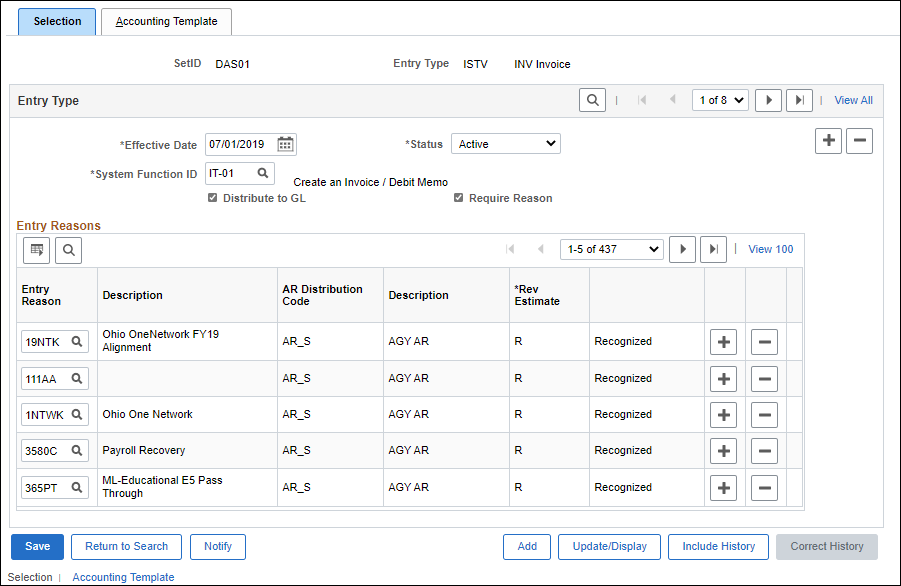
- The Entry Type tab displays.
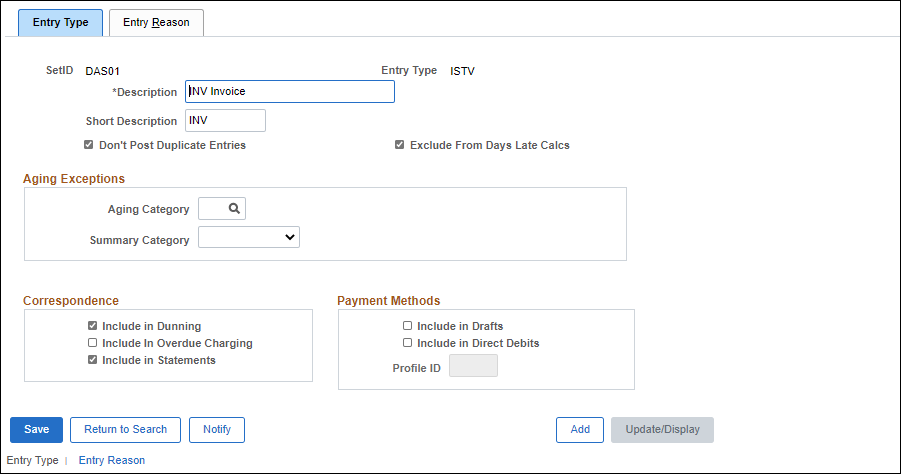
- Click the
Entry Reason
tab.
- The Entry Reason tab displays.
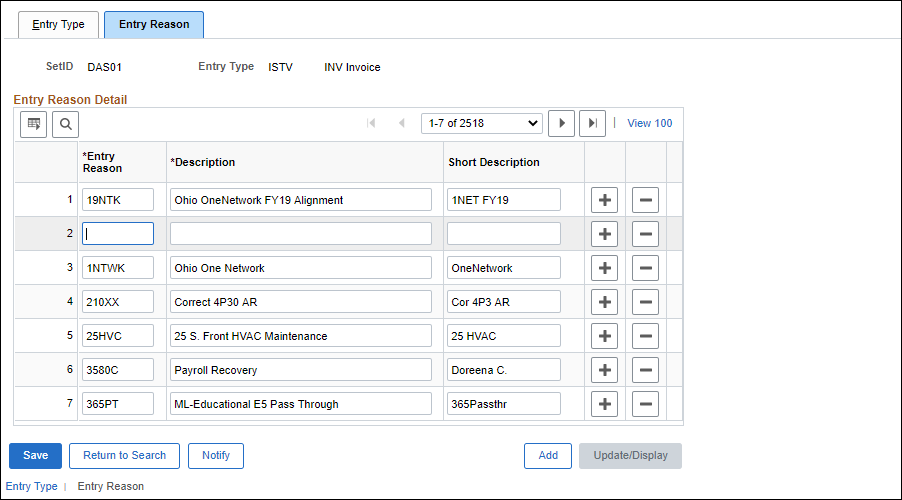
- Click an
Add a new row
icon in the Entry Reason Detail table.
- A new row displays in the Entry Reason Detail section, immediately under the row of the Add a new row icon clicked.
- Enter an agency determined code in the
Entry Reason
field.
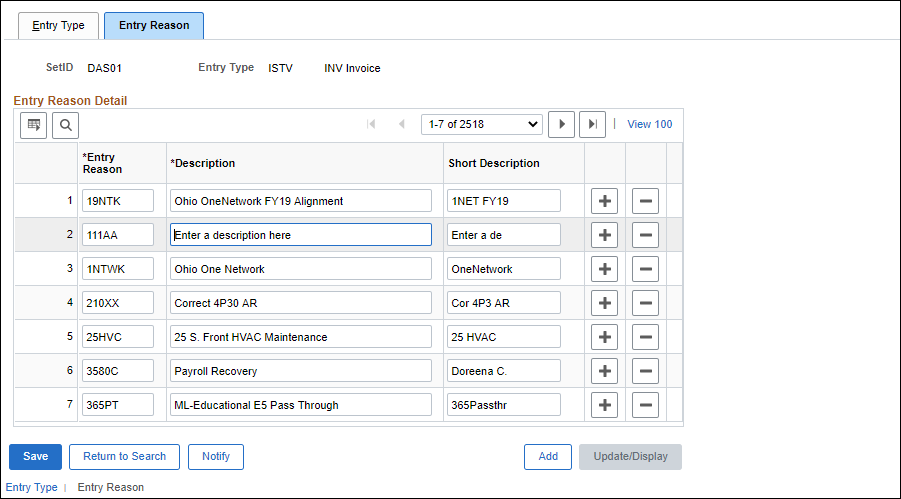
- Enter a brief description – i.e., the reason the code is used – in the
Description
field.
- Press Enter to auto-populate or manually enter a Short Description in the
Short Description
field.
- Typically, this is the same as the Entry Reason code, or something similar to it.
- Click
Save.
Entering Reason Code Distribution ChartFields
- Enter the agency specified Business Unit code in the
SetID
field.
- Select the
Correct History
checkbox.
- Enter or select the
Entry Type
.
- Click
Search
.
- The Selection tab displays the Entry Reasons for the selected Entry Type.
- If the Correct History checkbox was not clicked before clicking Search, click the
Correct History
button.
- Click an
Add a new row
icon in the Entry Reasons table.
- A new row displays in the Entry Reasons section, immediately under the row of the Add a new row icon clicked.
- Enter the previously created Entry Reason in the
Entry Reason
field.
- Click the
Accounting Template
tab.
- The Accounting Template tab displays.
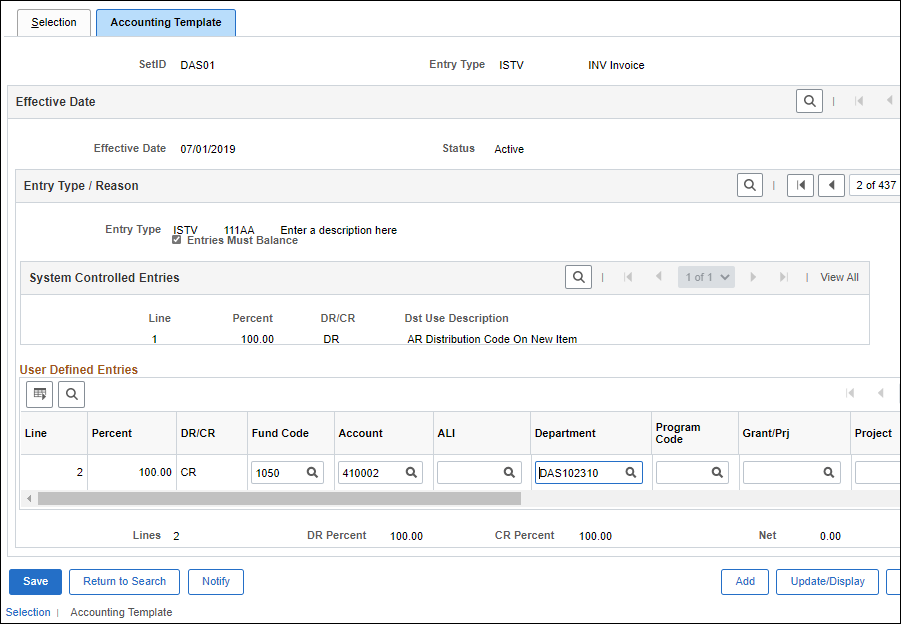
- Enter the distribution ChartFields; at a minimum the
Fund Code
,
Account
, and
Department
must be entered.
- Enter "47" in the
Account
field for
INV
types.
- If data is being entered for an ISTV type, enter data in the
ISTV
XREF
field.
- ISTVs must have an associated ISTV Account Code in the
Account
field.
- Additional fields must be entered depending on the agency specific departmental requirements.
- Click
Save.