Revised: 10/07/2024
Creating Payment Worksheets
Overview
Often, OAKS FIN Payment Predictor function can automatically identify the item for which a payment has been received. If the Payment Predictor cannot match a deposit, OAKS FIN creates a payment worksheet, which agencies must use to manually match the deposit. Agencies may also use this process to create a worksheet manually without attempting to use the Payment Predictor.
The worksheet identifies the
item(s) to which a payment should be applied. Note that a worksheet cannot be created manually while the Payment Predictor check box is selected.
Steps
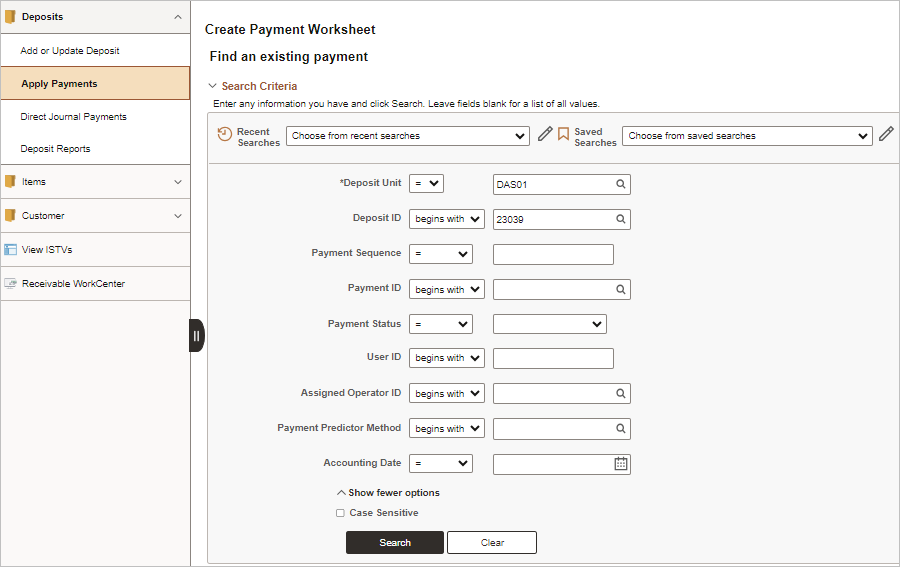
- Enter the Deposit Unit in the
Deposit Unit
field.
- Enter search criteria to locate the deposit. One way to do so is to enter the Deposit ID.
-
Click Search.
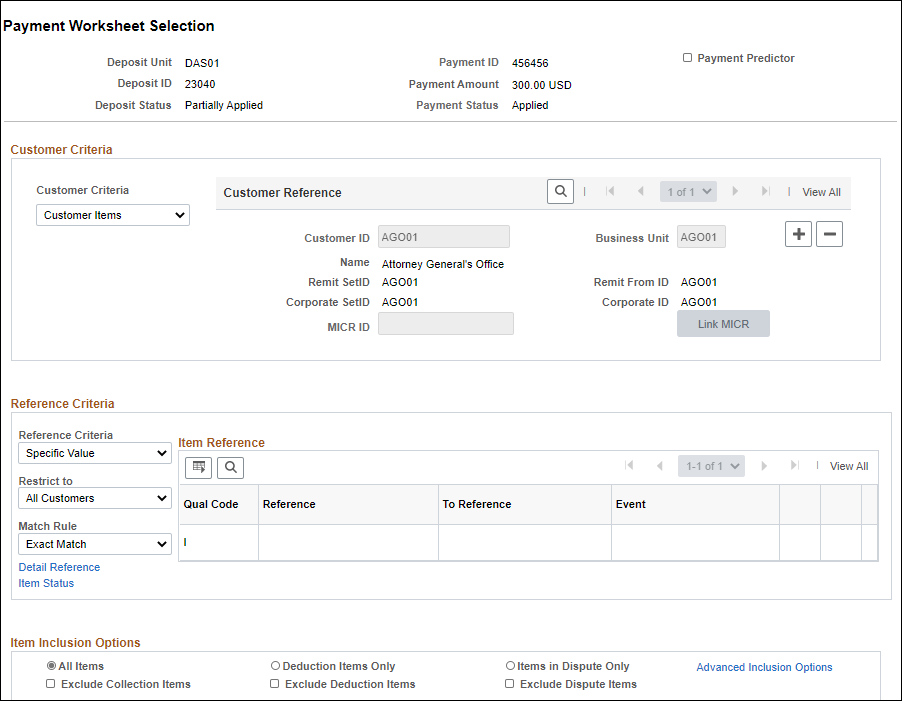
- The selected payment displays on the Payment Worksheet Selection page.
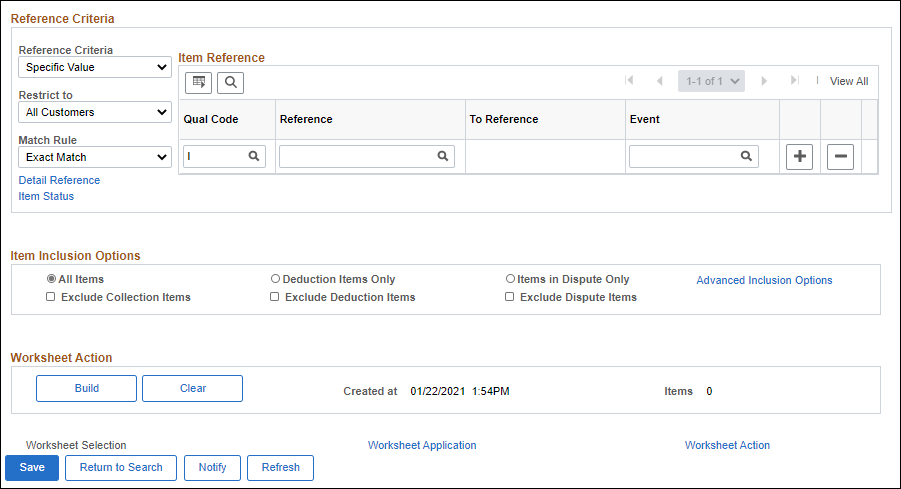
- The Payment Worksheet Selection page is used to refine selections for pending items. OAKS FIN enters items matching the entered criteria on the worksheet. The categories of criteria are:
- Customer Reference –Specific customer
- Item Inclusion Options –Selection of items to include or exclude
- Item Reference –Specific item numbers
- Use the
Customer Reference
section to identify customers whose items are to appear on the worksheets.
- Leave the default values to pull the pending items for the first customer (Customer One, ID CUSTONE). Otherwise, enter a Customer ID.
- Enter the agency-specific code in the Business Unit field to ensure that only the agency’s customers are selected.
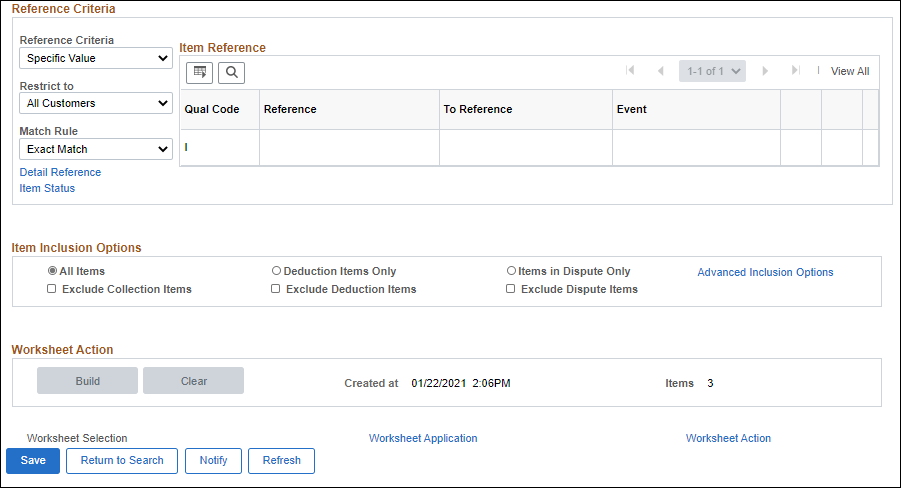
- Use the Item Reference section to identify specific items or ranges of items to include on the worksheet
- Enter the Reference Number in the Reference field.
- Select an Item Inclusion Option from the Item Inclusion Options section to limit the records pulled into the worksheet.
- The Item Inclusion Options include:
- All items
- Items in Dispute Only
- Deductions Items Only
- Click
Build.
- The Worksheet Application page displays all open items matching the criteria set on the Worksheet Selection page.
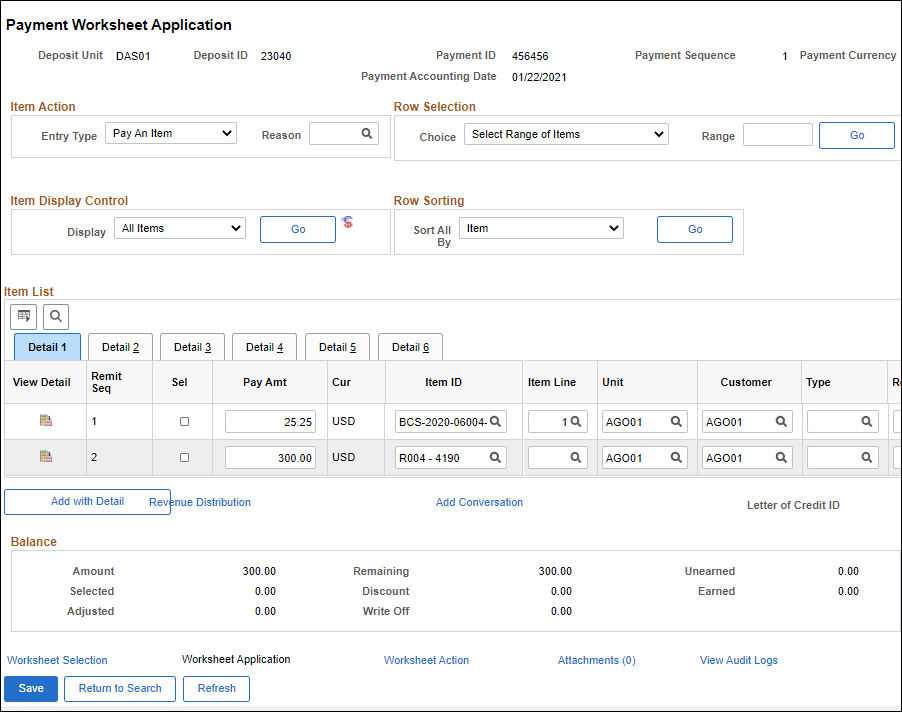
- Use the Worksheet Application page to apply the payment to items selected on the worksheet.
- The top line of the worksheet contains the identifying information for the Payment ID being applied
- The
Item Action
section defines the actions and accounting codes to apply to each of the selected items.
- Verify the Entry Type is "Pay An Item."
- If a Qual Code and Reference ID were entered for a specific item on the Worksheet Selection page, the results can be filtered to only see the results for that item by selecting "Selected" from the Display drop-down list.
- Click Go.
- Click the Sel field next to the item (or items) to which the payment is to be applied.
- The Balance section displays the payment Amount , the total amount of items that have been selected in the list, and the Remaining amount of the payment that can be applied towards further open items.
- If part of an item is being paid, edit the Pay Amt field to specify the amount currently being paid.
- The default amount of Pay Amt field is the full amount of the open item.
- Click
Save
to apply payment to the selected
item(s).
- The full payment must be applied before OAKS FIN will allow the payment to save.
- Click the
Worksheet Action
link.
- The Payment Worksheet Action page displays.
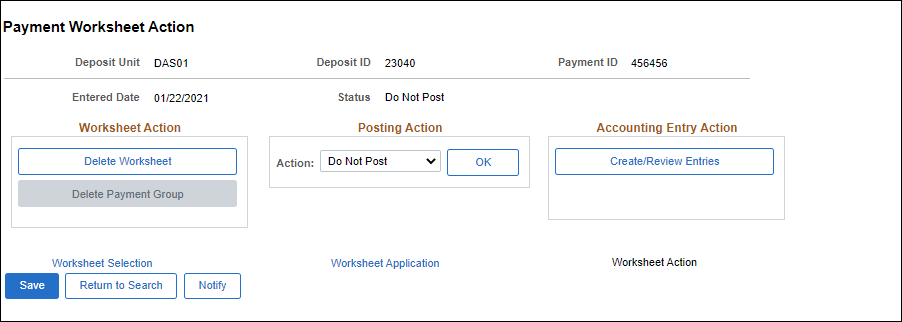
- Click
Create/Review Entries.
- OAKS FIN displays the ChartField strings on the Accounting Entries tab.
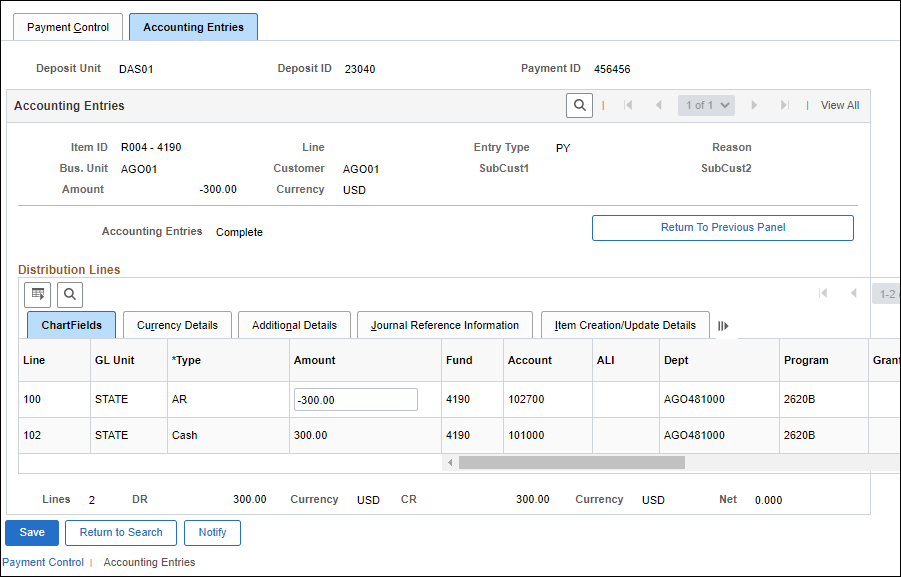
- Review at least the
Fund
,
Account
, and
Dept
fields for accuracy.
- Click
Return to Previous Panel.
- The Payment Worksheet Action page displays.
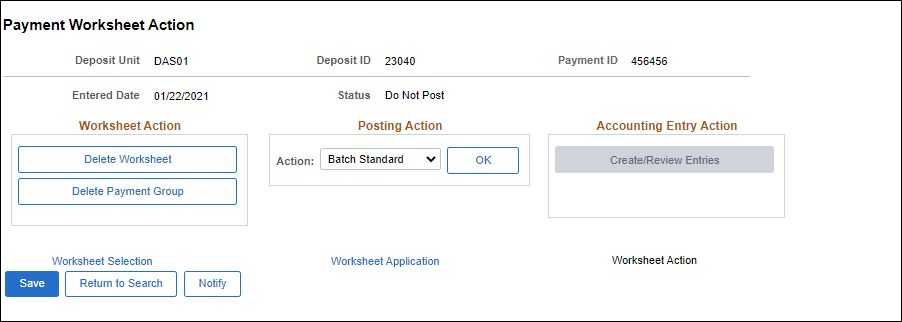
- Select
Batch Standard
from the Action dropdown list.
- Click
OK.
- Click
Save.
- Click the
Worksheet Selection
link.
- The Payment Worksheet Selection page displays.
- Click the
Next in List
button to apply the next payment in the batch.
- This process is useful if most or all of the payments in the batch are being applied.
- Instead of clicking Next in List, click
Return to Search
to access more of the payments in the batch.
- This process is useful if the batch contains many payments that are not being applied.


