Revised: 10/07/2024
Entering Pending Items - Manual Entry
Overview
Pending items are records entered into OAKS FIN to record invoices sent to customers, credit memos, debit memos, and Intrastate Transfer Vouchers (ISTVs). Customers may be another state agency or an external organization or individual. Customers are specific to an agency.
ISTVs can be created in either the Billing or Accounts Receivable module.
Agencies enter pending items manually or load them through the Pending Item Interface. When entering pending items manually online, agencies enter them as a group. OAKS FIN uses control groups for item entry, combining individual pending items into a group (batch) which provides error checking by verifying the group totals and counts. Groups are assigned types that indicate why the group was created. For this purpose, the state only creates billing groups (identified by the letter ‘B’) when items are entered online.
When reviewing the post data for the group – towards the end of this process - the GL Unit field is populated with the code STATE because in the OAKS FIN General Ledger Module there is only one business unit, i.e. STATE. In the other OAKS FIN modules, there is a business unit for each agency.
The account type is determined by the account number. For example, Revenue accounts start with "4.” Asset accounts start with "1.” A more detailed example:
- 430047 is the Revenue, Various Other Sales account
- 102900 is the Accounts Receivable account
- Reference the Expense Account Code Table for a complete list of account codes and their descriptions
- Run a ChartField Report to view a listing of Revenue Account Codes.
Steps
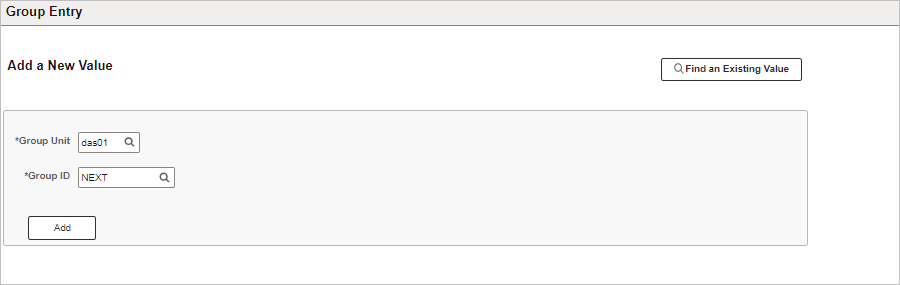
- Click the
Add New Value
button.
- Enter the ID of the agency owning this group in the
Group Unit
field.
- This field defaults to the user's agency and therefore should not need updating.
- Click
Add
to create a new value.
- The Group Control tab displays.
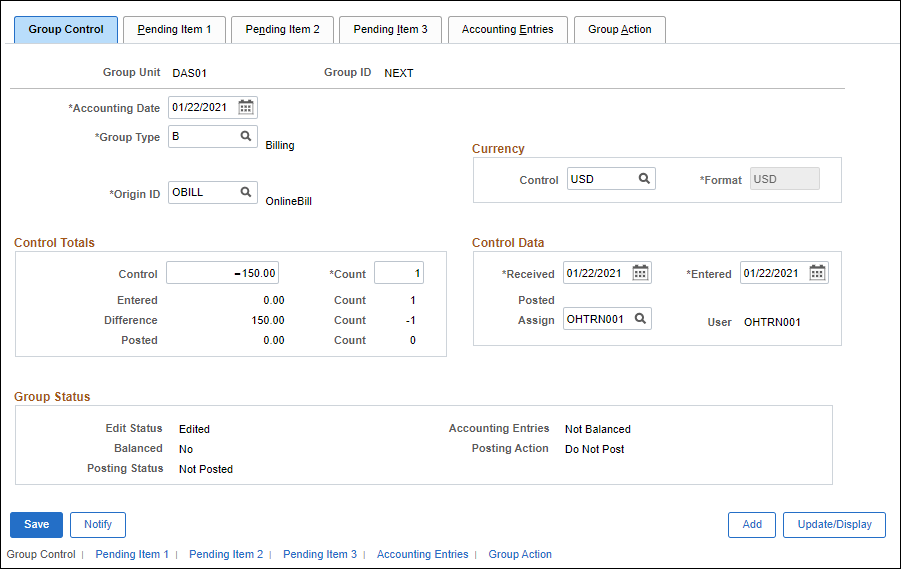
- Enter the Accounting Date in the
Accounting Date
field according to the agency's procedure.
- The Accounting Date determines the fiscal year and accounting period to which the pending item will be posted. OAKS FIN automatically sets the Accounting Date to the current date as the basis for calculating due dates and aging. The Accounting Date may also be used to enter the date when pending items were actually received.
- Enter "B" in the
Group Type
field.
- Enter " OBILL" (Online Billing) in the Origin ID field.
- Records created by the Billing Module Process have a value of
XBILL.
-
Enter "USD" (US Dollars) in the Control field in the Currency section.
-
Enter the total dollar amount of all bills that will be entered as part of this group in the Control field in the Control Totals section.
- OAKS FIN uses the Control Totals section to verify that all items have been entered correctly and that the group is in balance.
-
Enter the total number of bills that will be entered as part of this group in the Count field.
- OAKS FIN counts each separately-entered line item. For example, if there is an invoice with two line items that are being entered separately, plus another invoice, the count should be 3.
-
Verify or edit the Received and Entered date fields.
- These dates default to the current date. Received is the date the items were received for processing; Entered is the date of actual data entry.
-
Verify or edit the Assign field.
- This is the User ID of the person assigned to complete the group. The default is the person creating the group.
-
Click the Pending Item 1 tab, or the Pending Item 1 link at the bottom of the page.
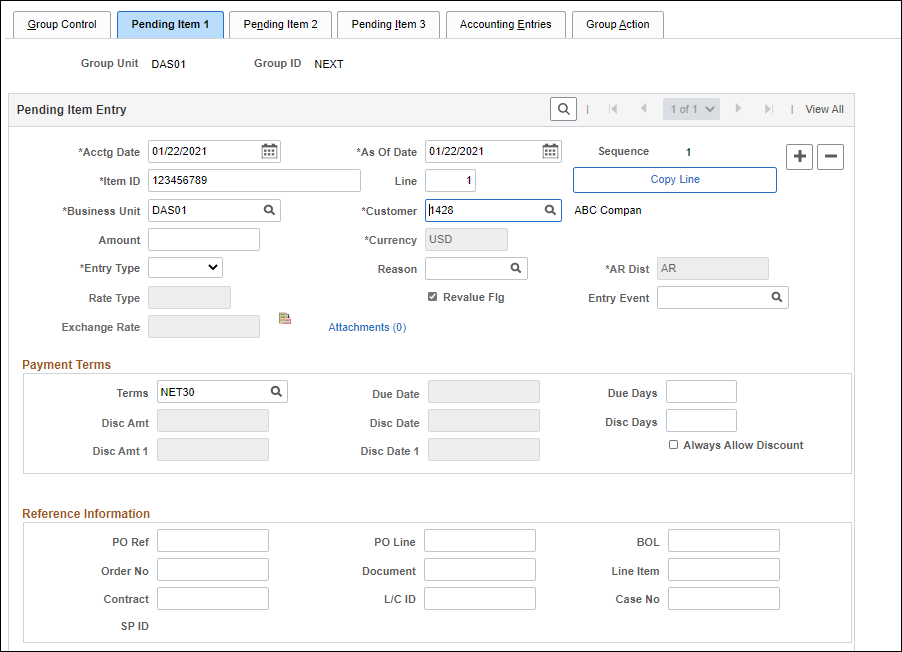
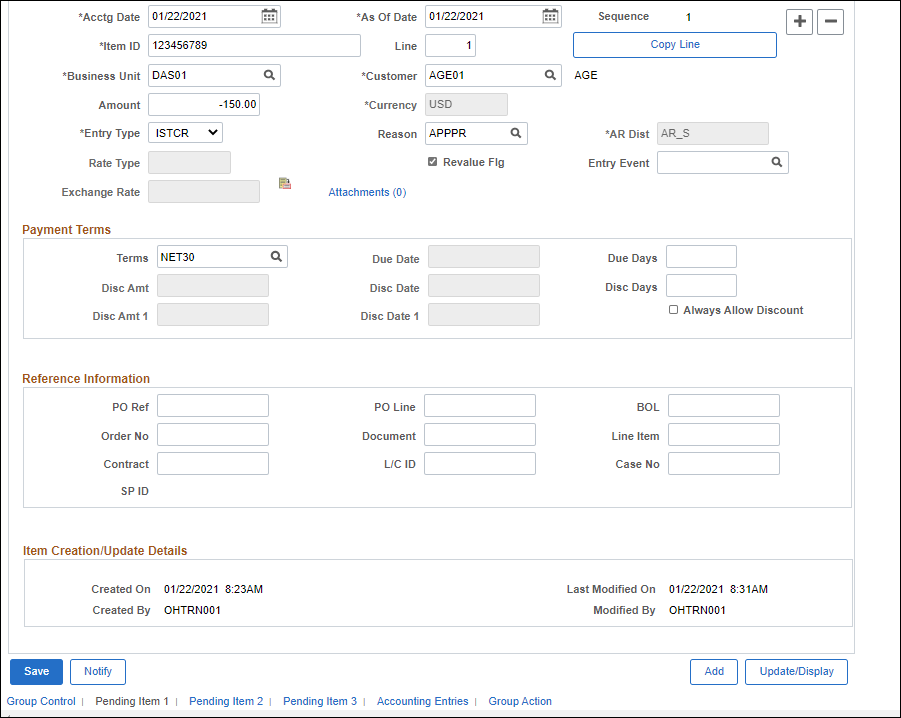
- Enter the invoice or document number of the item in the
Item ID
field.
- Enter the invoice Line Number in the Line field.
- Not all invoices have multiple lines. If an invoice has a single line item, leave the field blank, unless it is an ISTV. This field is required for all ISTVs, or for any invoice with more than one line.
-
Enter the Customer ID in the Customer field.
-
Click the Pending Item 1 tab.
-
Enter the line item or full invoice amount in the Amount field.
-
Click the Entry Type drop-down list and select the type of pending item being entered.
- Use the
Look Up Reason
icon next to the Reason field to select a reason for the line item.
- Reason codes are associated with various Entry Types and are “shortcuts” for ChartFields distribution strings. Certain agencies select a Reason code, and then make changes to the ChartFields string manually. If these changes are not made correctly, or if the Reason code has become invalid, an error will appear from the ChartFields combo edit validation when saved. The ChartFields should be corrected and saved again if this occurs.
- If needed, click the
Look Up Terms
icon next to the Terms field to select payment Terms.
- OAKS FIN uses payment terms pre-defined by the specified business unit (agency), typically "Net 30" days. These terms can be overridden as needed.
- Click the
Add a new row
icon to add a second line item or pending item.
- Repeat the steps above for entering either another line item from the same invoice (use the Line field) or the next invoice. Create pending items of the total number and dollar amount listed on the Group Control tab.
- Click
Save
.
- Click the Group Action tab.
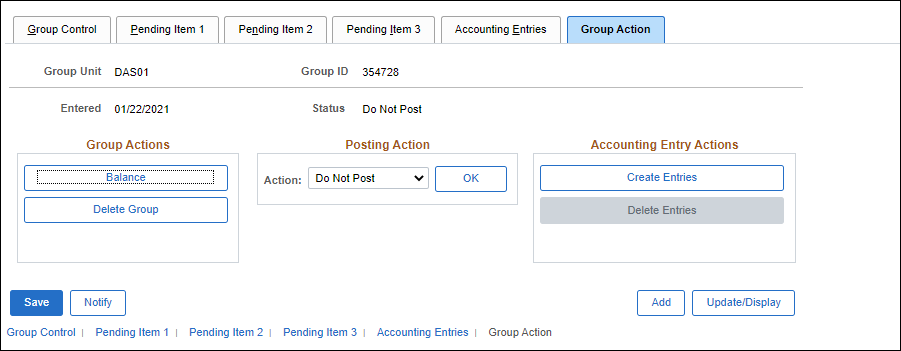
- This tab is used to create the accounting entries and to set the group posting action.
- Click
Create Entries.
- OAKS FIN displays the ChartField string on the Accounting Entries tab when the accounting entries are created.
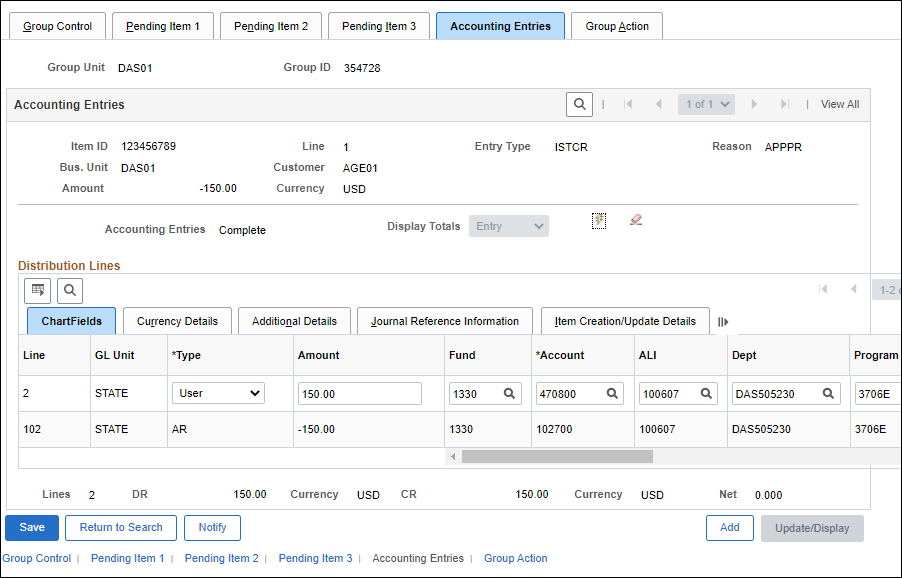
- The Reason code selected on the Pending Item 1 tab helps OAKS FIN fill in the ChartFields string. If the user's agency uses generic reason codes, fields with variable information must be completed by the user. Reason codes may also change and, occasionally, may contain errors that have not yet been corrected. OAKS FIN creates both revenue and cash accounting entry lines. When OAKS FIN processes this information, the second line inherits (copies) information from the top line to complete the ChartField entries.
- Review the ChartFields for accuracy, focusing on the
Fund
,
Account
, and
Dept
fields.
- There are two lines for each entry, debiting one fund and crediting another. The lower bar reflects these two entries; the bar above it displays the number of entries.
- Correct the ChartFields by either manually correcting the codes on the Accounting Entries tab, or returning to the
Pending Item 1
tab and selecting a different
Reason code.
- If the second method is used, click the Group Action tab.
- Click
Delete Entries.
- Click Create Entries to create the entries again.
- Click the Group Action tab.
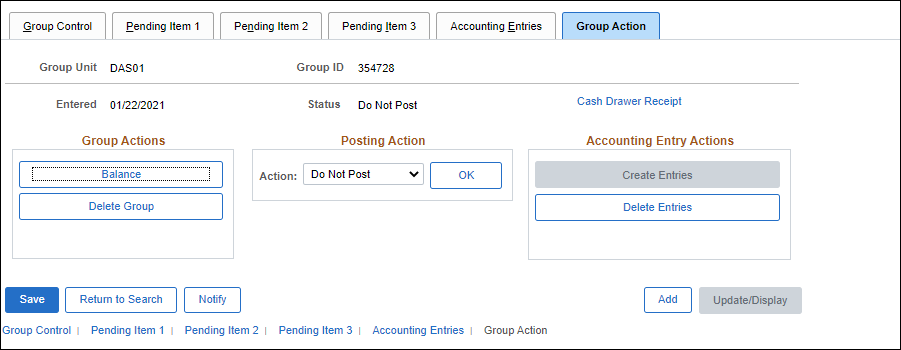
- Click
Balance
in the group actions section to balance the group.
- Click the
Group Control
tab.
- Verify that the
Balanced
field in the Group Status section displays "Yes."
- Verify that the
Accounting Entries
field in the Group Status section displays Balanced.
- If the Accounting Entries and Balanced fields indicate that the entries are not balanced, review your pending items and make corrections as necessary.
- Click the
Group Action
tab.
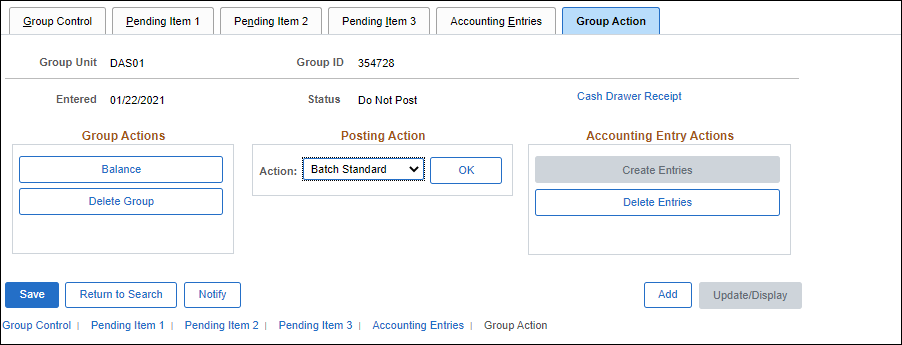
- Click the
Action
drop-down arrow and select
Batch Standard
.
- Once saved, the group will be available for posting when the ARUPDATE batch process runs. OAKS FIN automatically runs the
ARUPDATE process, also known as Accounts Receivable Posting, during the day at 8:00 AM, 9:00 AM, 10:00 AM, 11:00 AM, 1:00 PM, 3:00 PM and nightly Monday through Friday.
- Click
OK.
- The posting action is set.
- Click
Save.
- The group and its posting information are saved in OAKS FIN.