Spreadsheet Upload Installation Instructions
The Journal Spreadsheet Upload files are used to enter large amounts of journal information into OAKS FIN using a pre-defined spreadsheet template rather than manually entering journals online. Two separate Excel spreadsheets are used, one for uploading GL Journals and the other for Budget Journals. This topic illustrates how to copy and store the files needed to allow this process to work properly.
The Excel macros and XLSM files needed to create the budget journal file and GL journal file can be found on myOhio under My Resources. The Excel files contain a macro that the user will use to create, edit and save a journal, and the XLAM file is used to run the Excel macro. Both of these files will be stored together within the same directory. For example, the Excel macro and XLSM file for the Budget Journal Spreadsheet Upload will be stored together in the same sub-folder and the Excel macro and the XLSM file for the GL Journal Spreadsheet Upload will be in their own sub-folder.
-
Agency users must have the security authorization to install files on their computer. If an error message displays, the user should contact their agency's IT department for assistance. If an agency’s IT department needs further assistance, they need to contact OBM’s IT department at OBM.CustomerSupport@obm.ohio.gov
-
The steps and screenshots shown below were created using Windows 11 as the operating system, Microsoft Office 365 software and Chrome as the browser. Because there are a variety of options on users computers, not everyone will match the screenshots shown. However, the process remains basically the same.
Delete Old Spreadsheet and Macro Files
Steps
Before obtaining the new spreadsheet files, the user should delete the existing spreadsheet files and journal macros that are saved to their computer.
- Right-click the folderfolder containing the spreadsheet files.
- Click deletedelete.
- Click YesYes to confirm delete action.
- Open any Excel spreadsheet.
- The document will be used only for managing the add-ins for Excel.

- Click FileFile.
- Click MoreMore.
- Click OptionsOptions.
- The Excel Options page displays.

- Click on Add-InsAdd-Ins from the list displayed on the left of the page.
- The Add-Ins information displays in the Excel Options window.

- Ensure that default "Excel Add-ins" is displayed in the ManageManage drop-down box.
- Click GoGo.
- Remove the mark in the checkboxcheckbox next to JRNLMCRO_WS.
- Click OKOK.
- The old journal folder and the journal macro have been removed.
Create a Primary Folder with Two Sub-Folders
Steps
- Determine where the new files will be saved.
- Click on the computer desktop or local drivecomputer desktop or local drive where the file will be stored.
- Best practice: Use the documents folder on the PC.
- Name the new folder "Journal Upload."
- Follow agency guidelines if there are agency folder naming conventions.
- Double-click on the Journal UploadJournal Upload folder just created to open it.
- Two additional folders will be created within this folder.
- On the Home tab, click New FolderNew Folder.
- NameName this new sub-folder "Budget Journal Spreadsheet Upload."
- Within the new sub-folder "Budget Journal Spreadsheet Upload", create a new sub-folder.
- Name this new sub-folder "Macro."
- Go back to the Journal Upload folder level and click New FolderNew Folder again.
- NameName this new sub-folder "GL Journal Spreadsheet Upload."
- Within the new sub-folder "GL Journal Spreadsheet Upload", create a new sub-folder.
- Name this new sub-folder "Macro."
Download New Spreadsheet and Macro Files
Agencies must download two separate files from the myOhio website for each process:
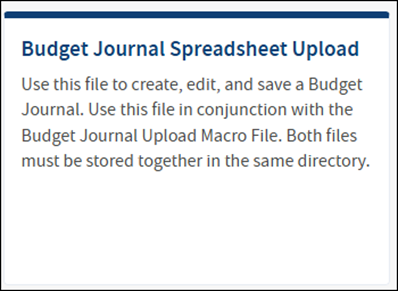
Budget Journal Spreadsheet Upload (BudgetJournalUpload.xlsm) AND
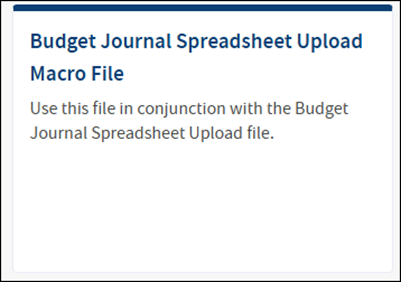
Budget Journal Spreadsheet Upload Macro File (Jrnlmcro2.xlam)
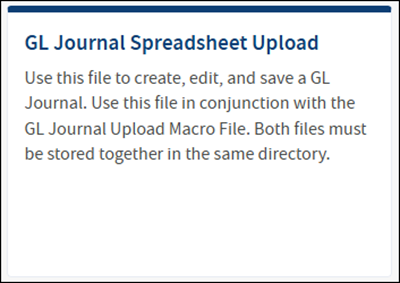
GL Journal Spreadsheet Upload (GL_Journal_Spreadsheet_Upload_JRNL2_WS.xlsm) AND
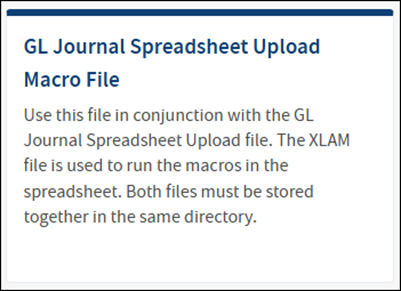
GL Journal Spreadsheet Upload Macro File (JRNLMCRO_WS.xlam)
Download the Budget Journal Spreadsheet Macro File
Steps
- Click on myOhio under My Resources and search using the term "budget journal."
- Click on the Macro file tileMacro file tile.
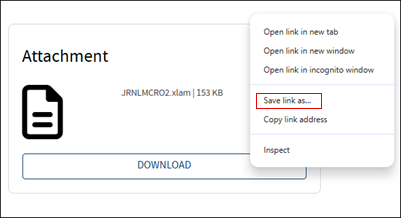
- Right-click Download button and select Save Link AsSave Link As.
- Click Enable MacrosEnable Macros if a security warning appears.
- BrowseBrowse to the location where the Journal Upload folder is stored.
- Double-click on the Journal UploadJournal Upload folder.
- Double-click on the sub-folder Budget Journal Spreadsheet UploadBudget Journal Spreadsheet Upload.
- Double-click on the sub-folder MacroMacro.
- Click SaveSave.
- CloseClose the window.
- The JRNLMCRO2.xlam download is complete.
Downloading the XLSM Budget Journal Spreadsheet
Steps
- Click on myOhio under My Resources and search using the term "budget journal."
- Click on the Budget Journal Spreadsheet Upload file tileBudget Journal Spreadsheet Upload file tile.
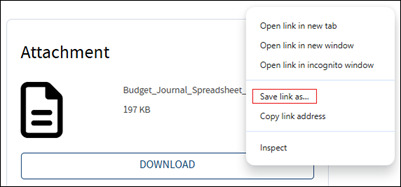
- Right-click Download button and select Save Link AsSave Link As.
- BrowseBrowse to the location where the Journal Upload folder is stored.
- Double-click on the Journal UploadJournal Upload folder.
- Double-click on the sub-folder Budget Journal Spreadsheet UploadBudget Journal Spreadsheet Upload.
- Click SaveSave.
- CloseClose the window.
- The BudgetJournalUpload.xlsm download is complete.
Installing the Macro
Steps
- Open the Budget Journal Spreadsheet UploadBudget Journal Spreadsheet Upload sub-folder.
- Double-click on the Budget Journal Spreadsheet Upload.xlsm fileBudget Journal Spreadsheet Upload.xlsm file.
- The Excel spreadsheet opens.

- Click Enable ContentEnable Content on the Security Warning yellow bar at the top of the page to enable the macro.
- Go to FileFile.
- Click OptionsOptions.
- Click Add-InsAdd-Ins.
- Click GoGo.
- A list of macro Add-ins availableAdd-ins available will display.
- If the add-in Budget Journal Upload Tool Macro does appear, put a check mark beside it.
- If the add-in does not appear, follow the next step.
- Click BrowseBrowse.
- Go to the Budget Journal Spreadsheet file
- HighlightHighlight the Jrnlmcro2.xlam file.
- Click OKOK.
- The budget spreadsheet template is ready to use.
Downloading the GL Journal Spreadsheet Macro File
Steps
- Click on myOhio under My Resources and search using the term "gl journal."
- Click on the GL Journal Spreadsheet Upload Macro file tileGL Journal Spreadsheet Upload Macro file tile.
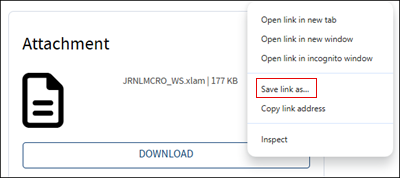
- Right-click Download button and select Save Link AsSave Link As.
- Click Enable MacrosEnable Macros if a security warning appears.
- BrowseBrowse to the location where the Journal Upload folder is stored.
- Double-click on the Journal UploadJournal Upload folder.
- Double-click on the sub-folder GL Journal Spreadsheet UploadGL Journal Spreadsheet Upload.
- Double-click on the sub-folder Macro Macro .
- Click SaveSave.
- CloseClose the window.
- The JRNLMCRO_WS.xlam download is complete.
Downloading the XLSM GL Journal Spreadsheet
Steps
- Click on myOhio under My Resources and search using the term "gl journal."
- Click on the GL Journal Spreadsheet Upload file tileGL Journal Spreadsheet Upload file tile.
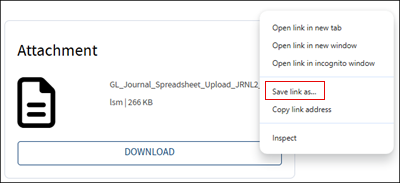
- Right-click Download button and select Save Link AsSave Link As.
- BrowseBrowse to the location where the Journal Upload folder is stored.
- Double-click on the Journal UploadJournal Upload folder.
- Double-click on the sub-folder GL Journal Spreadsheet UploadGL Journal Spreadsheet Upload
- Click SaveSave.
- CloseClose the window.
- The GL_Journal_Spreadsheet_Upload_JRNL2_WS.xlsm download is complete.
Installing the Macro
Steps
- Open a new Excel spreadsheet.
- The Excel spreadsheet opens.

- Go to FileFile.
- Click OptionsOptions.
- Click Add-InsAdd-Ins.
- Click GoGo.
- A list of macro Add-ins availableAdd-ins available will display.
- If the add-in does appear, put a check mark beside it.
- If the add-in JRNLMCRO_WS does not appear, follow the next step.
- Click BrowseBrowse.
- Go to the GL Journal Spreadsheet Upload folder.
- Double-click the Macro folderMacro folder.
- HighlightHighlight the JRNLMCRO_WS.xlam file.
- Click OKOK.
- The GL spreadsheet template is ready to use.


