Operating Budget Data Exchange (File Upload) |
Revised: 07/19/2024 |
Data Exchange is where users upload budget data via a file into the Budget Enterprise Application.
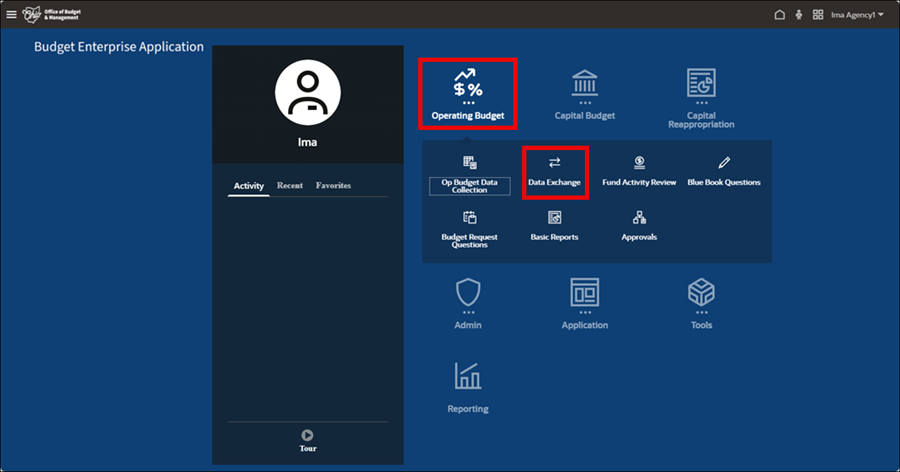
- Select the Operating Budget tile from the homepage.
- Select Data Exchange icon.
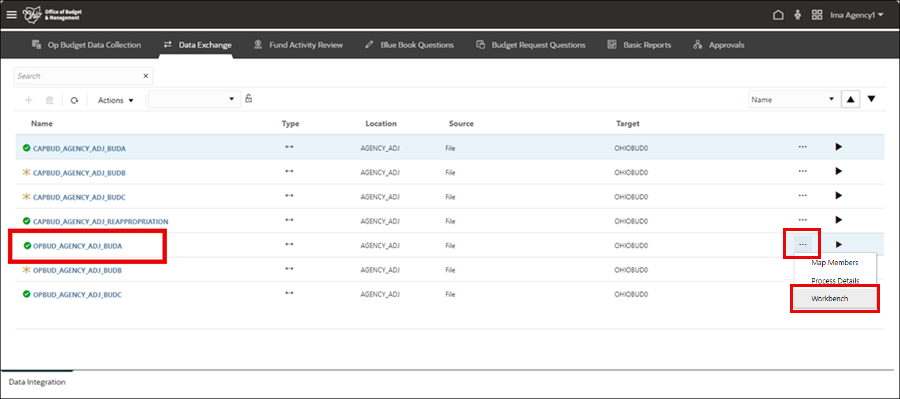
- The Data Integration page displays.
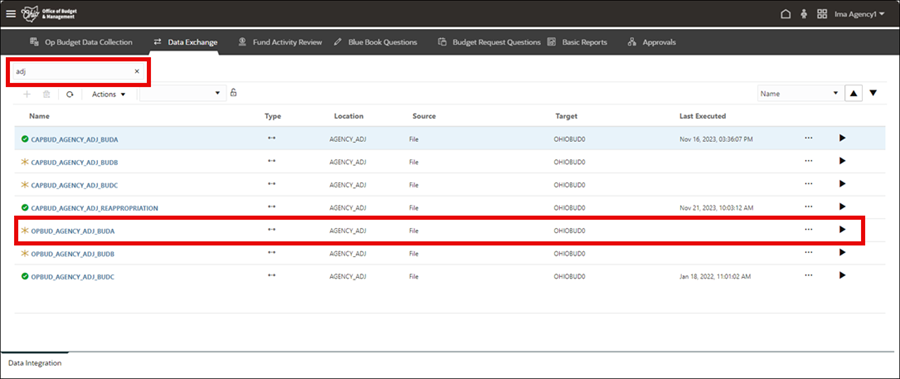
- Search for OPBUD_AGENCY_XXX_BUDA (XXX represents applicable agency).
- Click row to highlight where the data will be loaded. Do not click the name of the report.
- Status Indicators:
 A check mark indicates a successful upload.
 An asterisk ( * ) is a neutral status. No upload has been attempted.
 An "x" indicates a failed upload.
 An exclamation point within a triangle indicates data has loaded with warnings.
- Notes for a successful upload:
- Use the OBM-provided upload template.
- Ensure fund numbers do not appear as scientific notations (e.g., 4E40).
- Ensure the fiscal years in the file and the Run Integration prompts are correct.
- Save the template as text in a comma delimited (.csv) file.
- Work in the Excel file rather than the .csv format.
- If changes are needed, reopen the Excel file and resave it in the .csv format.
- Click the run button (arrow) next to the applicable data item.
- The Run Integration pop-up window displays.
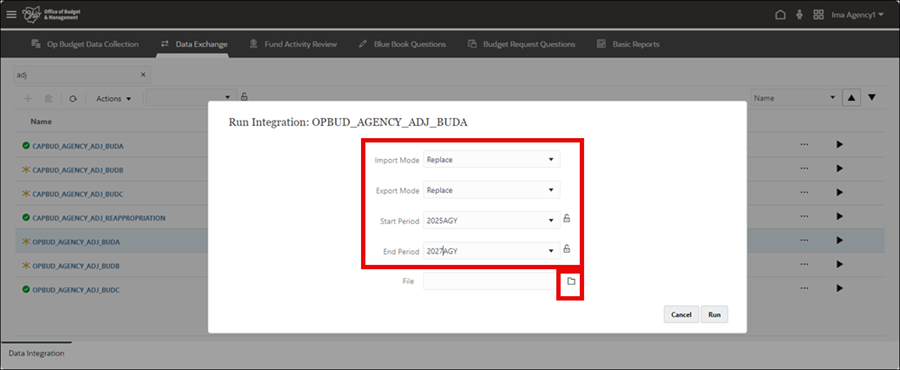
- Set Import Mode to Replace in the drop down.
- Set Export Mode to Replace in the drop down.
- Setting to Replace will overwrite current data (i.e., destructive upload).
- Set Start Period as year/agency (Example: 2025AGY).
- The Start Period is the first, or earliest, fiscal year that appears in the upload file.
- Set End Period as year/agency that spans the data range to be uploaded (Example: 2027AGY).
- The End Period is the last, or latest, fiscal year that appears in the upload file.
- Click File Browser icon.
- The File Browser page displays.
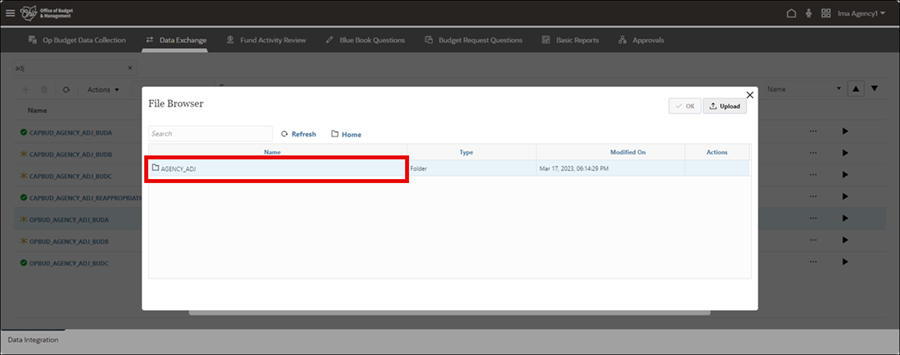
- Double-click the agency folder to open.
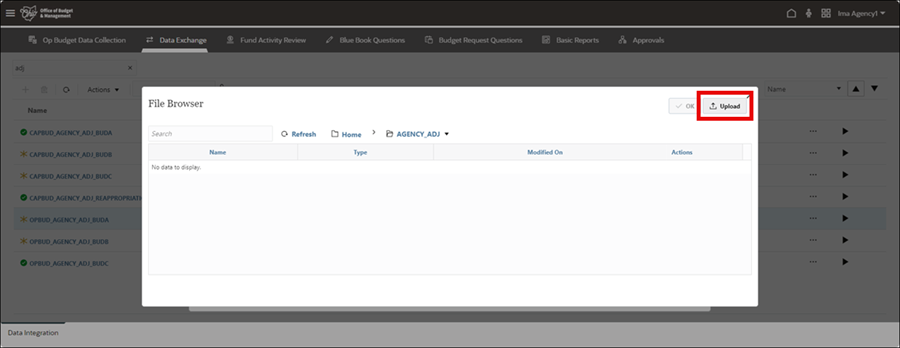
- Click Upload.
- Locate the .csv file to open in the user's files.
- Select OK to upload the file.
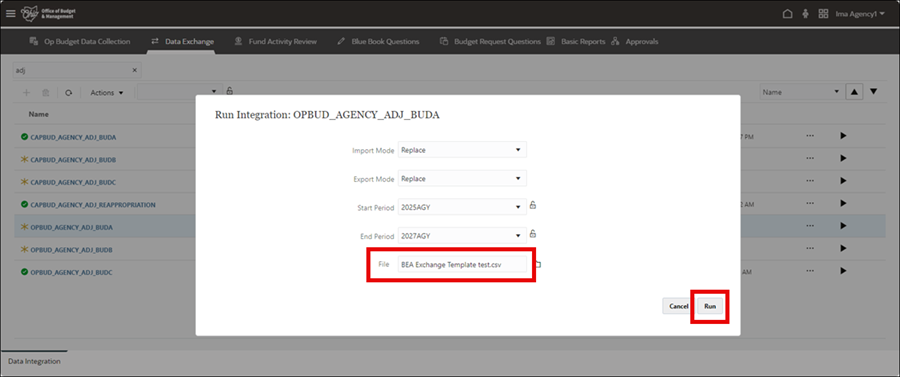
- The .csv file name will display in the File field.
- Click Run.
- The Executing Integration runs through an "Import," then "Validate," and finally "Export." A status message will display indicating if the process has completed successfully or if the process failed.
- The data file will update with a green check mark if data successfully loaded. To validate uploaded data go to the 121.E.Budget Data Collection-Expense - OPBud and the 121.T.Budget Data Collection-Revenue and Transfers - OPBud forms. See the Operating Budget Data Collection job aid.
- Error Messages:
- "Integration process failed with errors" indicates that the file has errors in format or content. Review the upload file and correct errors such as missing fiscal years, dropped leading zeros, or funds in scientific notation format.
- "Integration process completed with warnings" indicates that the fiscal years selected on the Run Integration page do not match the fiscal years in the csv file. Correct the input values on the Run Integration page.
- If the upload is unsuccessful, enter the Workbench to identify errors. The Workbench can be accessed from the Executing Integration pop-up or via the Actions drop down on the main Data Integration page.
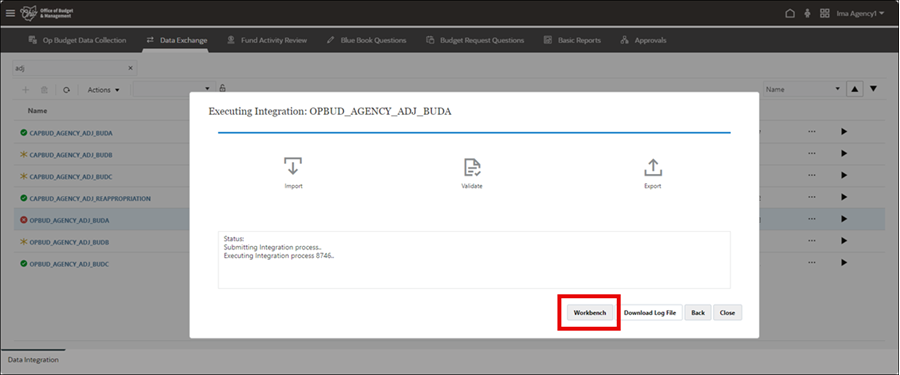
- Select Workbench (to see what data loaded).
- NOTE: The Workbench can also be accessed through the report (see last image below).
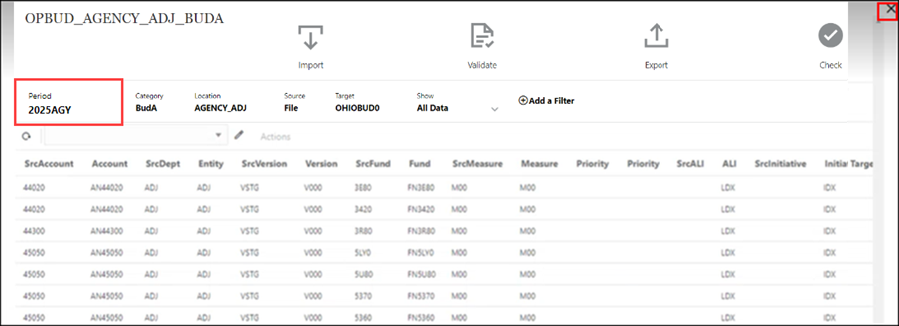
- Data appears by fiscal year, which is determined by the Period filter in the upper left corner.
- Review for accuracy. Use the Period filter to check data for other years (e.g., 2025AGY).
- Click the x to close the window.
- The Data Integration page displays.
- Status indicator displays a successful upload.