Revised: 10/07/2024
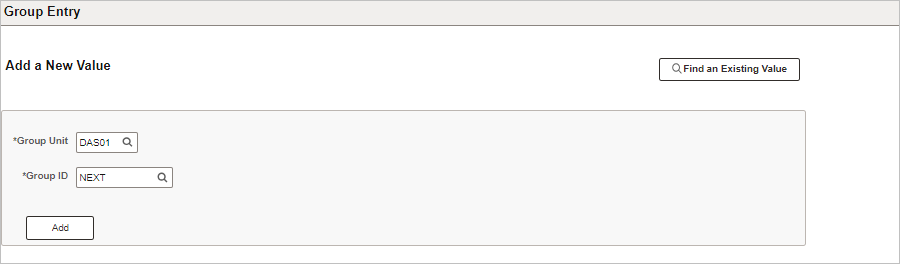
This is a 2-step process (create a maintenance items worksheet to offset the item)
A debit memo is used increase the balance of the customer for a correction.
A credit memo is used to decrease the balance of the customer for a correction.
Credit memos are used when an item was posted outside of the current Fiscal Year.
Credit memos are used when there are multiple items in a group. This can occur for payments in prior or the current fiscal year.


Enter the amount of the debit or credit in the Amount field.
Click the Entry Type dropdown list and select the appropriate Entry Type. These Entry Types are:
CR - Third-party credit memo
DR - Third-party debit memo
ISTCR - Interagency credit memo
ISTDR - Interagency debit memo
Use the Look Up Reason icon next to the Reason field to select a reason for the line item.
Reason Codes vary by Entry Type and are “shortcuts” for ChartFields distribution strings.
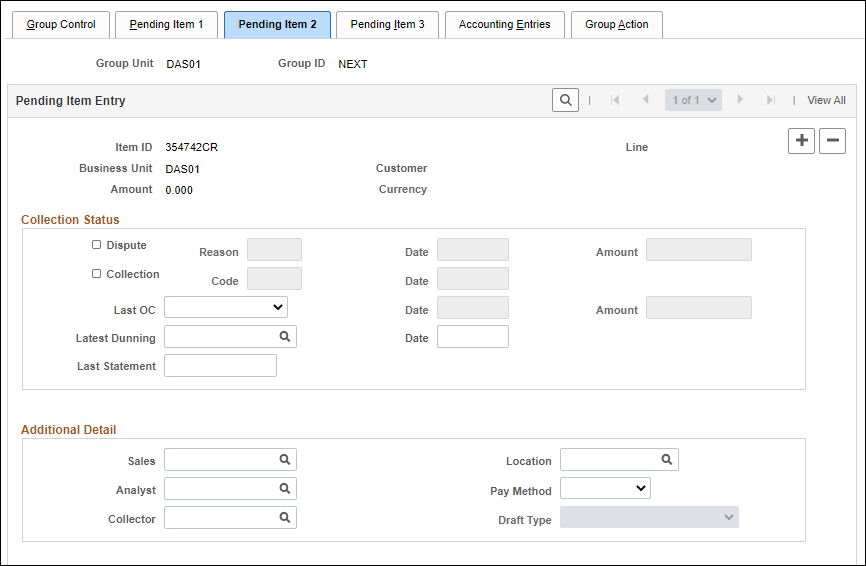
If entering an ISTV, click the Pending Item 2 tab.
Click the Group Action tab. This tab is used to create the accounting entries and to set the group posting action.
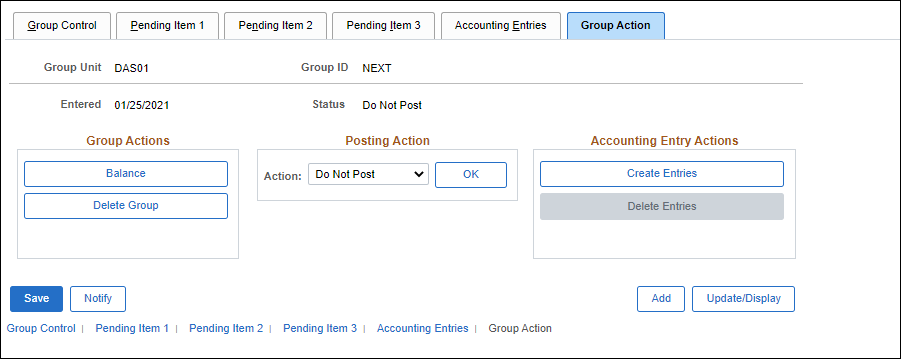
Click Create Entries .
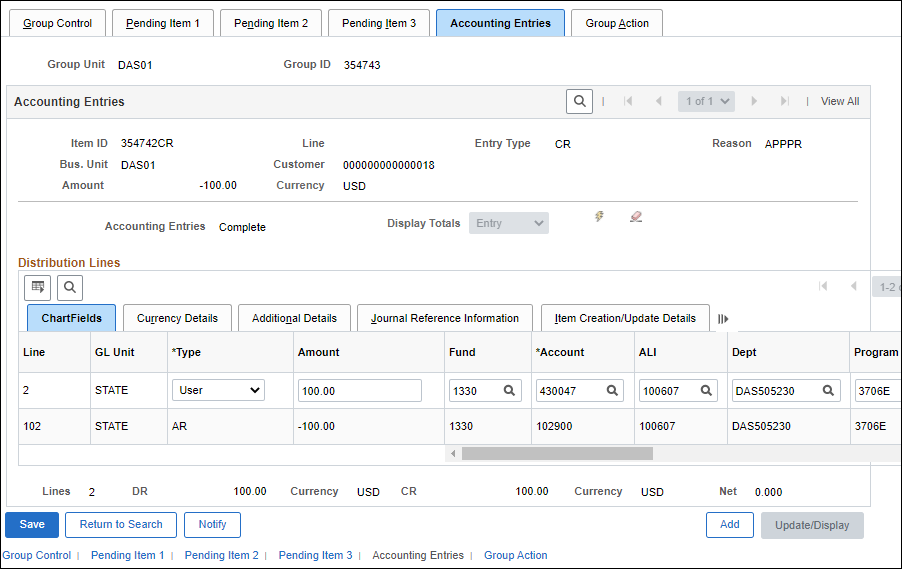
OAKS FIN displays the ChartField string on the Accounting Entries page when the accounting entries are created.
The Reason Code selected on the Pending Item 1 tab helps OAKS FIN fill in the ChartFields string. Agencies that use generic Reason Codes must complete fields with variable information. Reason codes may also change and, occasionally, may contain errors that have not yet been corrected. Update Reason Codes when necessary.
Refer to ChartField Characteristics to review available ChartFields strings.
OAKS FIN creates both revenue and receivable accounting entry lines. When OAKS FIN processes this information, the second line inherits (copies) information from the top line to complete the ChartField entries.
Review the ChartFields for accuracy, focusing on the Fund , Account , and Dept fields.
At the change of the federal fiscal year, pay attention to the Grant/ Prj field, since items may be processed for both new and old grants. Update Reason Codes when necessary.
Correct the ChartFields by either manually correcting the codes, or returning to the Pending Item 1 tab and selecting a different Reason code.
If the second method is chosen, click the Group Action tab.
The Group Action tab displays.
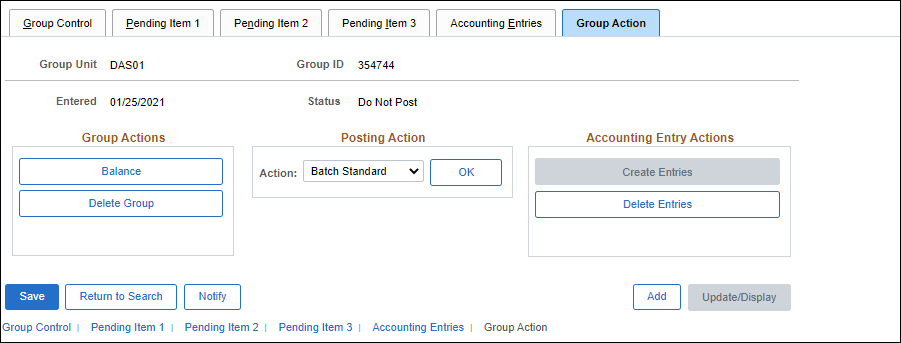
Click Delete Entries .
Click Create Entries to create the entries again.
Click the Action dropdown arrow and select Batch Standard .
Once saved, this will make the group available for posting when the ARUPDATE batch process runs.
Click OK.
Click Save.
| Click here to request updates to this topic. |
|