Revised: 2/29/2024
After all steps have been followed for Setting Up Spreadsheets for Upload, continue with the steps listed below. As mentioned in that topic, the filename listed next should have been saved locally (or on a network drive) with other files in the same folder. They must remain in the same folder for them to work.
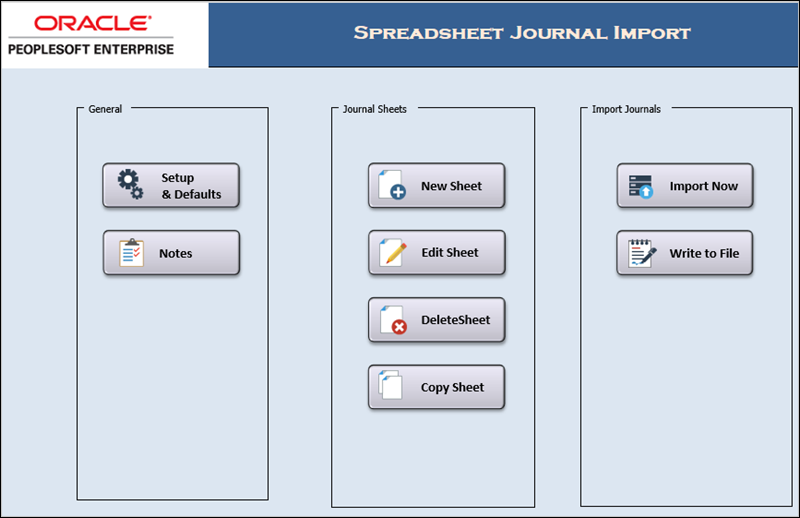
The file opens, displaying the Spreadsheet Journal Import control page.
If Excel displays a Security Warning, choose to Enable Content.

Click New under Journal Sheets heading.
Enter a name for the sheet in the New Journal Sheet Name field.
This is the name for the spreadsheet but it does not impact the name of the OAKS FIN Journal.
Click OK.
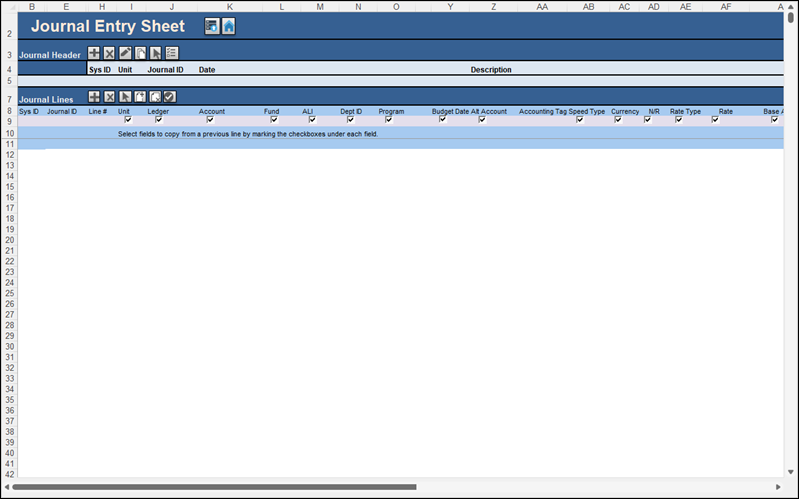
The new spreadsheet journal displays.

Click the  button (on row 3 at the left of the page) to open the New Journal Header window.
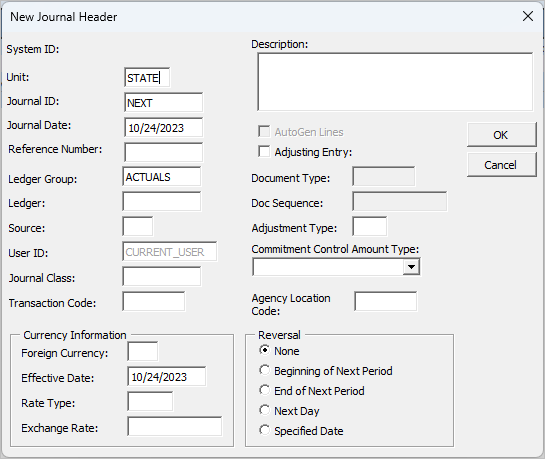
A New Journal Header window displays.

If information is entered directly onto the header line rather than using the  button, an error message will be displayed.
The information entered here uniquely identifies an agency’s journal in OAKS FIN. Changes made on this window affect this journal only. Do not alter the information on the Define Options and Defaults page.
Verify that the Business Unit field is populated with "STATE". (Must be ALL CAPS.)
In the Journal ID field, enter a description (maximum 10 characters) that begins with the agency's code.
Although the spreadsheet journal allows more than 10 digits to be entered into the Journal ID field, OAKS FIN removes all digits after the 10th digit when uploading your agency‘s journal.
Enter the appropriate date in the Journal Date field.
The Journal Date is the date the journal posts to the General Ledger.
Enter the appropriate Source.
"PAY" - Payroll correction journals.
"SPJ" - Everything else
Enter the purpose of the journal in the Description field (up to 250 characters).
Do not change the Reversal field options. Only OBM changes these.
Click OK to finish this journal header and display it on the journal spreadsheet.
The information entered on the New Journal Header window displays on line 4.
Click the  button in the Line section (on row 9) to add a journal line.
The spreadsheet adds two grey lines, lines 11 and 12. Line 11 separates the journal lines from the ChartFields and must remain blank. The spreadsheet adds this blank line the first time a journal line is added. The spreadsheet displays the Journal ID entered in the journal header in the first field of line 12.
Typing directly into the line will cause an error message to display; and, it will explain that the area is write-protected.
Enter the necessary ChartFields on Line 12.
The required ChartFields depends on journal type.
Expenditures journals require: Fund, Account, ALI, Dept, Service Location.
Revenue journals require: Fund, Account, Dept.
The following data is standard data to be entered for all journal entries:
Business Unit – "STATE" (must be caps).
Ledger Group - "ACTUALS" (must be caps).
Spaces cannot be entered in any Chartfield. An error will occur upon Save of the .TXT file if any spaces are entered. User will not be able to proceed until spaces are removed.

Enter the Amount.
Enter debits as positive numbers ($500 would be 500.00 or 500).
Enter credits as negative numbers (-$500 would be -500.00 or -500).
The specific fields are indicated by the heading on Line 7. Select the check boxes on line 8, except for the ones associated with the Account and Amount fields. These two fields should NOT be selected.
When boxes are checked, it indicates that as lines are added, that field should be duplicated.
Click the  button on row 9.
The ChartFields information is copied to a new line.
Enter the appropriate Account Number for the balancing journal entry.
Enter the appropriate Amount for the balancing journal entry.
Click Save.
Step-by-step instructions for Reviewing and Uploading Spreadsheet Journal Entries are covered in the next topic.