Revised: 10/07/2024
Creating ISTV Receivables
Intrastate Transfer Vouchers (ISTVs) are used by state agencies to invoice other state agencies, or other departments within the selling agency, for goods or services provided. An ISTV voucher must be entered in OAKS FIN to issue payment to the selling agency.
A selling (billing) agency creates an ISTV pending item (receivable) in Accounts Receivable. The process for adding an ISTV pending item is very similar to creating a regular pending item. Use the Entry Type "ISTV" along with the ISTV
Xref field. The selling agency reviews the pending item and if necessary, corrects any errors. The selling agency can attach the invoice and make it available to the buying agency on the ISTV Viewer Page.
Steps
- myOhio.gov > MY WORKSPACE > Financials Globe > NavBar > Menu > Accounts Receivable > Pending Items > Online Items > Online Item Group Entry
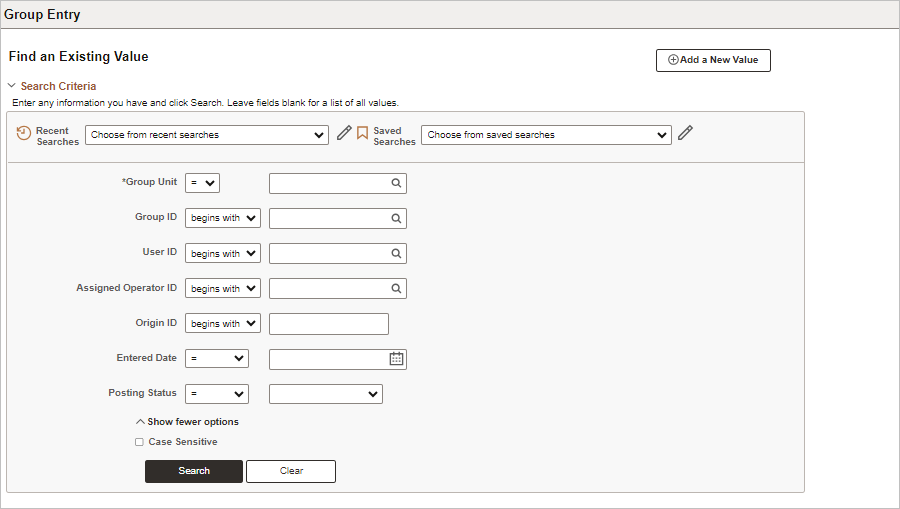
Create an ISTV Pending Item
-
Click the
Add New Value
tab to create a new pending item group.
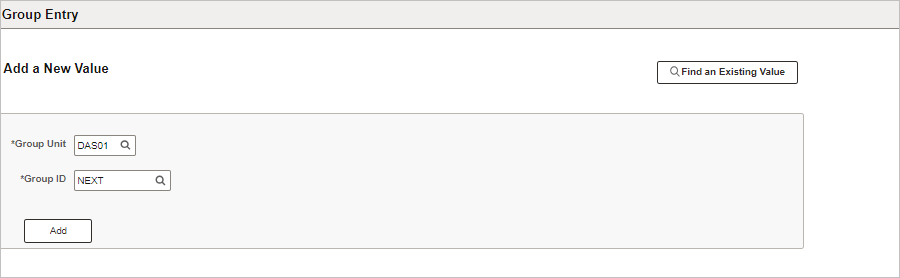
-
Enter the ID of the agency owning this group in the
Group Unit
field.
-
Accept the Group ID value
"NEXT"
or follow the agency’s numbering convention for ISTV receivables.
-
Click the
Add
button to create a new value.
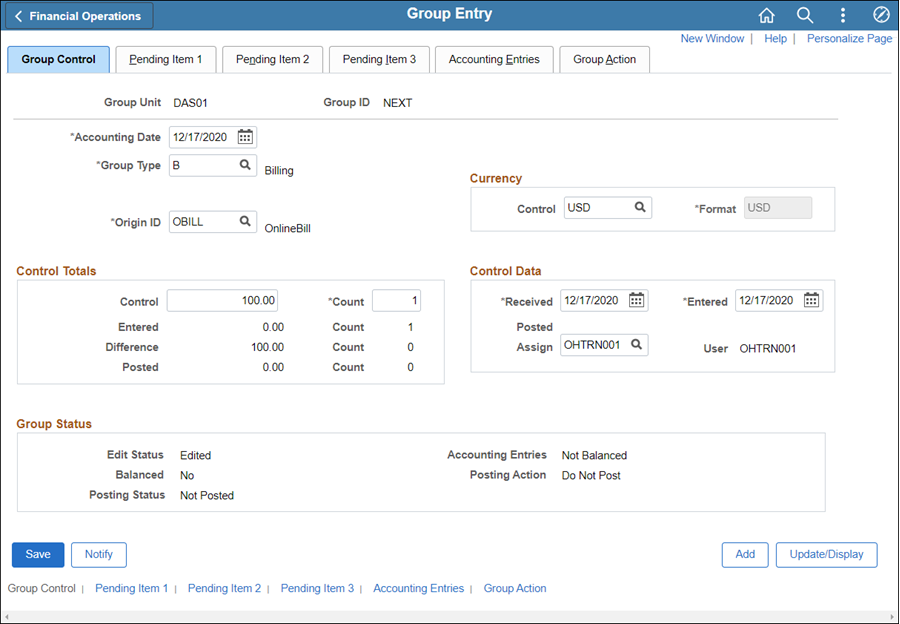
- Enter the
Accounting Date
according to agency procedures.
- The Accounting Date determines the fiscal year and accounting period to which the pending item will be posted. OAKS FIN automatically sets the Accounting Date to the current date as the basis for calculating due dates and aging. The Accounting Date may also be used to enter the date when pending items were actually received.
- Enter "B" in the
Group Type
field.
- Enter "
OBILL" (Online Billing) in the
Origin ID
field.
- Records created by the Billing module process have a value of
XBILL.
- Enter "
USD" (US Dollars) in the Currency
Control
field.
- If USD is not listed here at the group header level, the Currency Control must be entered for each line item.
- Enter the total dollar amount of all bills that will be entered as part of this group in the Control Totals
Control
field.
- OAKS FIN uses the Control Totals field area to verify that all items have been entered correctly and that the group is in balance.
- Enter the total number of lines for all items that will be entered as part of this group in the
Count
field.
- OAKS FIN counts each separately-entered line item. For example, an invoice with two line items entered separately, plus another invoice, the count would be "3."
- Click the
Pending Item 1
tab, or the link at the bottom of the page, to begin entering the first item.
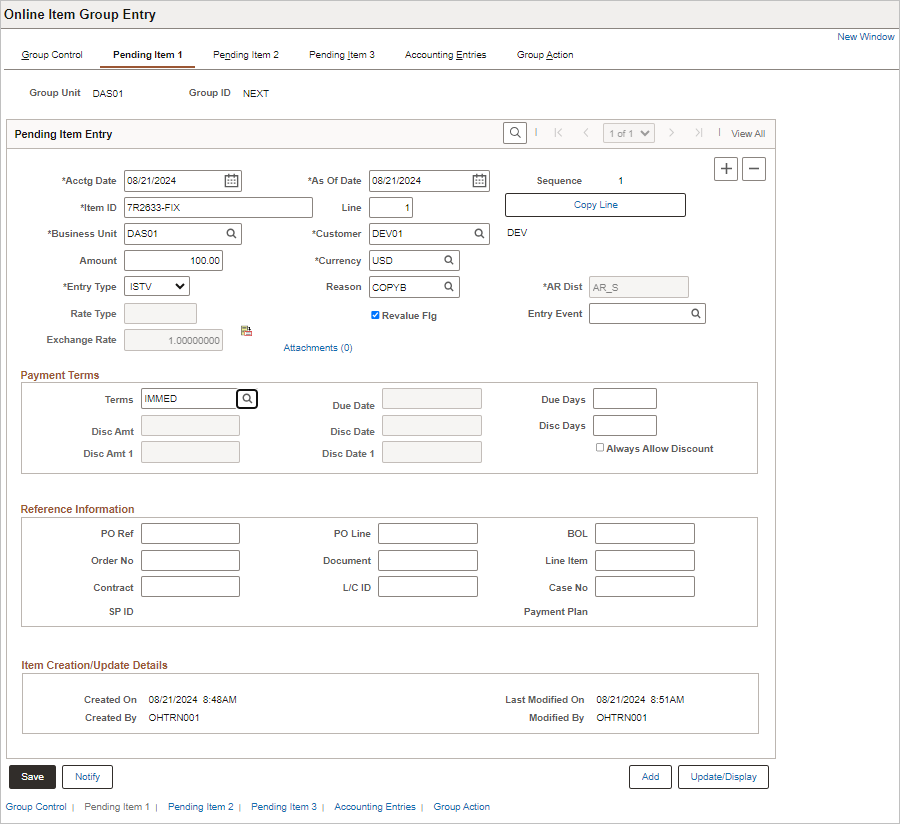
- Enter the
Item ID
(invoice number).
- Duplicate Item IDs must not be used. Using the same Item ID for different customers causes vouchers to error because the amount does not agree with the corresponding AR balance.
- Follow the agency’s standard practice for creating an Item ID.
- It’s a good idea to incorporate the customer's agency ID in the numbering system. For example, if the buyer is DEV01, the invoice number could be DEV001234. Use sequential numbers to make printing invoices easier.
- Click in the
Line
field and enter the number of lines for this pending item.
- Ensure there’s at least a “1” in this field or Payment Predictor will not apply the payment to the customer.
- Click the
Copy Line
button to add additional lines when needed.
- Click in the
Customer
field and enter the buying agency's Business Unit ID as the Customer ID.
- Enter the line item or full invoice amount in the
Amount
field.
- Click the
Entry Type
Entry Type
drop-down list and select the type of pending item being entered.
- ISTV - Intrastate transfer voucher
- ISTCR - Intrastate credit memo
- ISTDR - Intrastate debit memo
- Credit and Debit memos are used to make corrections to ISTVs.
- An Entry Type of “ISTV” will automatically change the value in the
AR
Dist
field to “
AR_S.” This value is specifically for ISTVs and cannot be changed.
- Use the Look-up icon next to the
Reason
field to select a reason for the line item.
- Reason codes vary by Entry Type and are “shortcuts” for ChartField distribution strings. Each agency uses its own reason codes. The agency AR Administrator or supervisor can provide a list for the agency.
- Select the
Attachments
link to add relevant documents.
- The
number of attachments
is listed next to the Attachments link.
- If an attachment was not uploaded before the item was processed, it can be added later in Customer Conversations and be accessed through the ISTV Viewer Page.
- Click the look up button to select payment
Terms.
- OAKS FIN uses payment terms pre-defined by the specified business unit (agency).
- These terms can be overridden as needed.
- Click the
Add a new row
icon to add a second line item or pending item if needed.
- Repeat the instructions above (14-21) for entering either another line item from the same invoice (use the Line field) or the next invoice.
- Create pending items of the total number and dollar amount listed on the
Group Control
tab.
- Click
Save.
- After saving, the Group ID will change from “NEXT” to a number. Make a note of the Group ID.
- An
error message
will appear if the customer does not have an origin code. See Maintaining Customers for steps to add an origin code to an existing customer.
- Click the
Pending Item 2
tab, or the link at the bottom of the page, to enter the customer address number in the
Location
field.
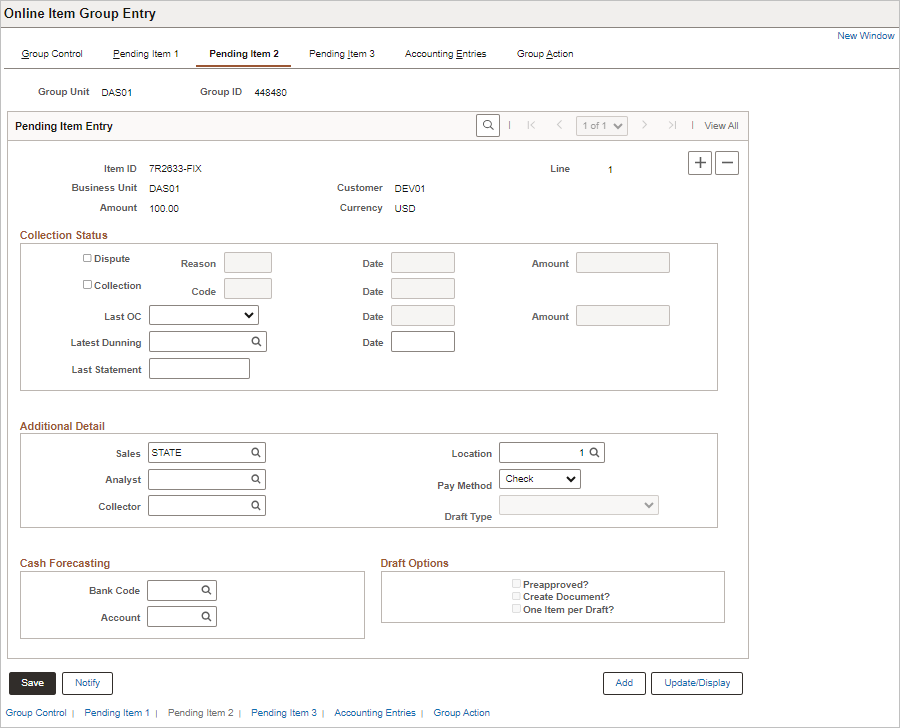
- The location controls the origin that will be used to create the AP voucher for an ISTV.
- If an item is created using multiple lines use the same location across each line.
- If an item is created without a location, the system will use the primary “Bill To” location on the transaction.
- Do not use the Pending Item 3 tab.
- Click the
Group Action
tab.
- This tab is used to create the accounting entries and to set the group posting action.
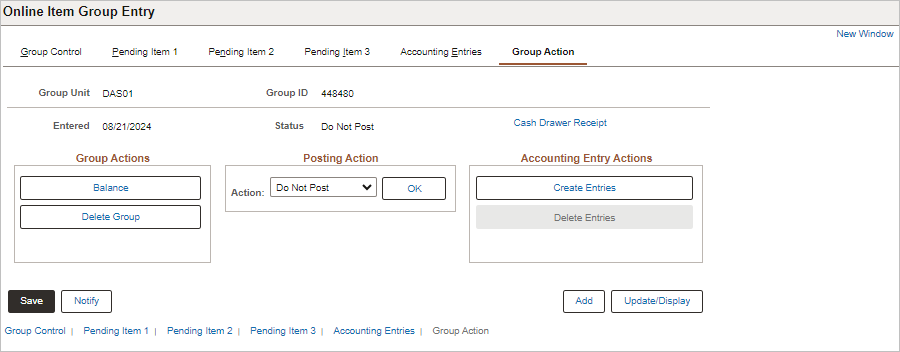
- Click the
Balance
button to verify that the entries balance.
- OAKS FIN verifies that the number of lines entered, and the dollar amounts for each item match the control totals.
- Click the
Create Entries
button.
- OAKS FIN displays the ChartField string on the Accounting Entries page when the accounting entries are created.

- The Reason code selected on the Pending Item 1 tab helps OAKS FIN fill in the ChartFields string. If the agency uses generic reason codes, fields with variable information must be completed. Reason codes may also change and, occasionally, may contain errors that have not yet been corrected.
- OAKS FIN creates both revenue and cash accounting entry lines. When OAKS FIN processes this information, the second line inherits (copies) information from the top line to complete the ChartField entries.
- Review the ChartFields for accuracy, focusing on the Fund, Account,
Dept
, and ISTV
Xref
fields.
- Click
View All
, or use the arrows to navigate between lines.
- There are two lines for each entry, debiting one fund and crediting another. The lower bar reflects these two entries; the bar above it displays the number of entries.
- When clicking away from the Group Action tab and clicking back, the entries will no longer be visible. Click the Accounting Entries tab to view entries again.
- Correct ChartFields, when necessary, by either manually correcting the codes, or returning to the Pending Item 1 tab and selecting a different
Reason
code.
-
Delete Entries
and then Create Entries again when using the second method.
- Click the
Group Control
tab.
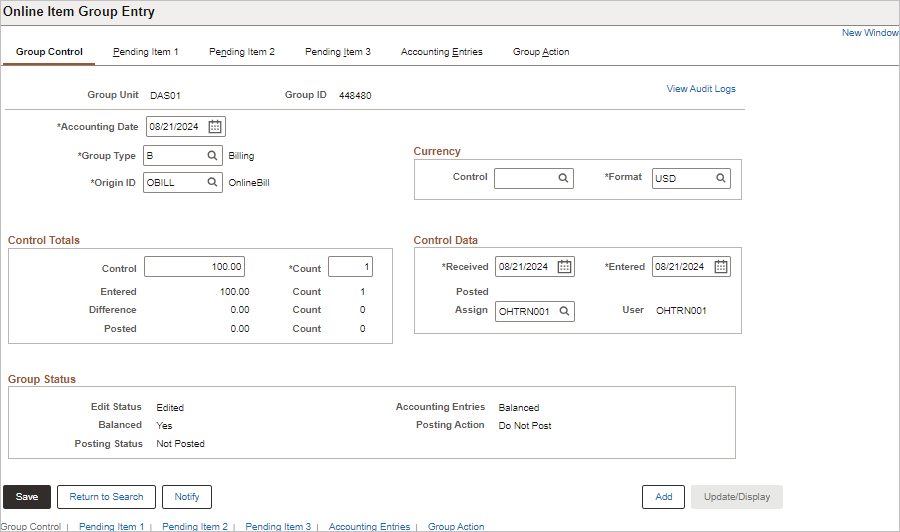
- Verify that the
Balanced
field in the Group Status section displays "Yes."
- Verify that the
Accounting Entries
field displays Balanced.
- Review pending items and make corrections as necessary if the Accounting Entries and Balanced fields indicate that the entries are not balanced.
- Verify the selling agency's acronym (i.e.,
DASB) in the
ISTV
Xref
field in the Distribution Lines on the Accounting Entries tab.
- Click the
Group Action
tab.
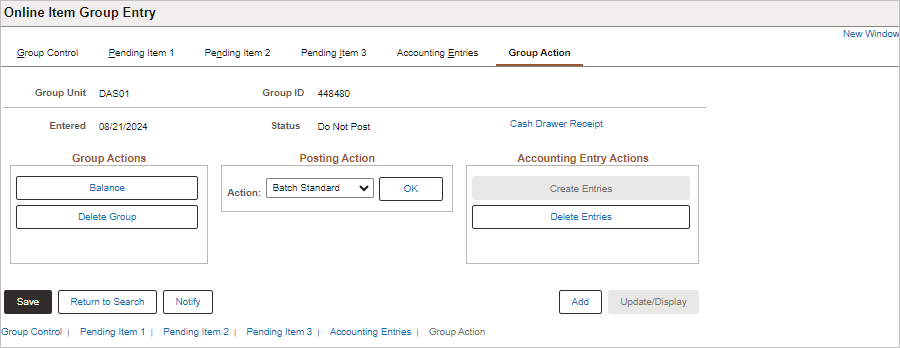
- Click the
Action
drop-down arrow and select Batch Standard.
- Click
OK.
- The posting action is set.
- If the buying agency referenced does not have an origin code in the customer record, a warning message will display and the voucher will not be created.
- Click
Save.
- Once ARUPDATE has run, review the pending items to make sure they posted.
- Review the group for errors if pending items did not post.
- The orgin code will determine the automatic routing path. The buying agency will need to use the ISTV Viewer page to open the attached invoice.
- Mail documents if not attached to ISTV item.
- A deposit/payment is created on the AR side after the voucher pays. This deposit will run through payment predictor and be posted automatically.