Revised: 12/16/2024
Spreadsheet journal entries are created by the agency GL processor when creating a payroll correction journal or payroll reclassification journal. The GL processor uses a spreadsheet that has an embedded macro. After entering the necessary data, the GL processor triggers the macro which creates a .txt file.
The file is sent to the agency GL approver who reviews the journal lines and approves the spreadsheet. They then create and upload the .txt file. The method of sending the file to the agency GL approver varies by agency. See Reviewing and Uploading Spreadsheet Journal Entries for more details.
Click here for file installation instructions.
For each file listed, go to myOhio under My Resources and search using the terms "budget journal" or "gl journal." Click on the respective tile name. Right click on the download button and select "Save link as ..." Then choose where the files should be saved (for example, go to "My Documents" and then create a new folder called "Spreadsheet Journal Upload Files" where they are placed).
When a spreadsheet journal entry is created, it will be creating an Excel file. Each agency has a specific location to which files should be saved. Ask others in your agency where these should be saved.
Find the Excel file named GL_Journal_Spreadsheet_Upload_JRNL2_WS.xlsm and open it.
If prompted for it, click Enable Content.
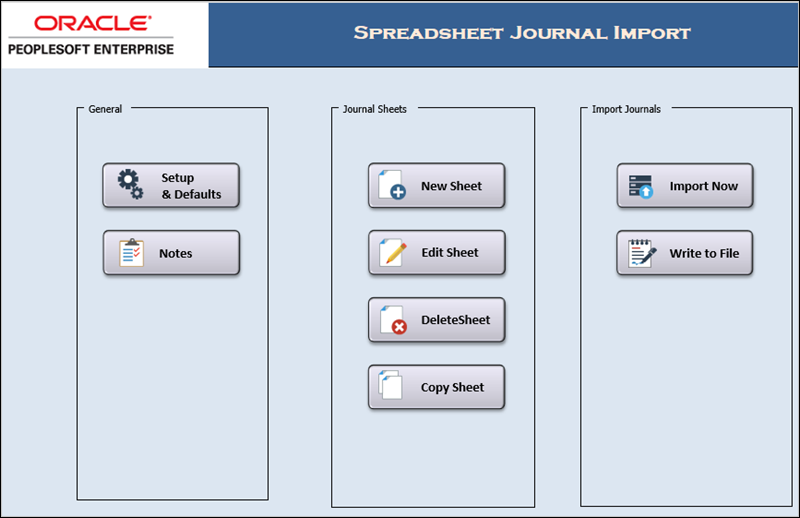
When first opened, the file displays the Spreadsheet Journal Import control page which has three sections:
General - These buttons are used to set up journal header information. Data is entered a single time and then it automatically displays in the spreadsheet when creating new journals.
Journal Sheets - These four buttons are used to create, edit, delete, and copy spreadsheet journals.
Import Journals - The Write File button is used to create the .txt file.
Click Setup & Defaults in the General section to set up header information for a spreadsheet Journal.
The Define Options and Defaults window opens.
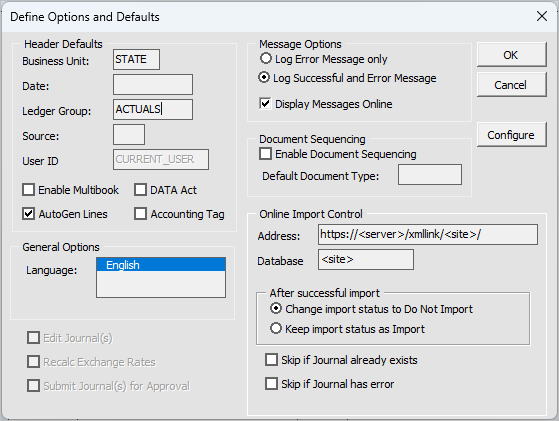
The Define Options and Defaults window allows the agency user to set up information which automatically populates each time the spreadsheet is used. This is a one-time task. When using Define Options and Defaults, do NOT define a Date. If this is done, OAKS FIN automatically puts that date on every journal line entered.
Some data is automatically populated. Verify fields are correct and enter any additional fields required.
Verify that the Business Unit is "STATE."
Verify that Ledger Group field is "ACTUALS."
See the Ledger Group Crosswalk for further explanations of ledger groups.
If desired, notes can be entered.
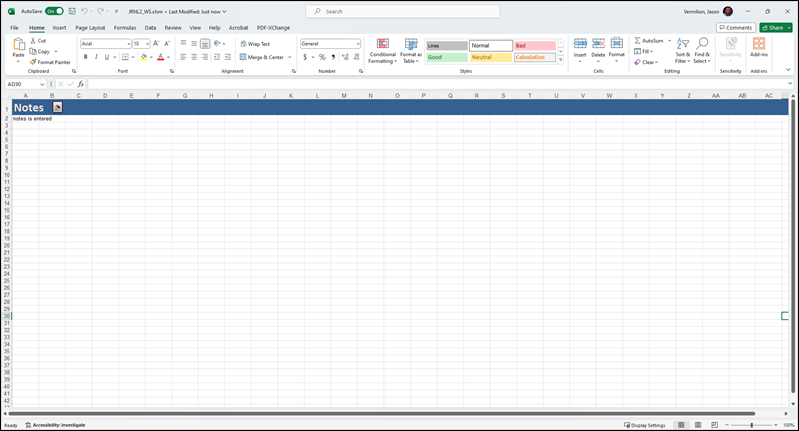
When finished, click Go Home button at top of the Excel spreadsheet when done with that page.
Notes and calculations can be entered into this Excel spreadsheet page. There is no formatting on this page. Information entered here does not go to OAKS FIN when journal entries are imported. It's just a "workspace" or "notes" space.
Under Journal Sheets, click the New Sheet button.
The New Journal Sheet window displays.
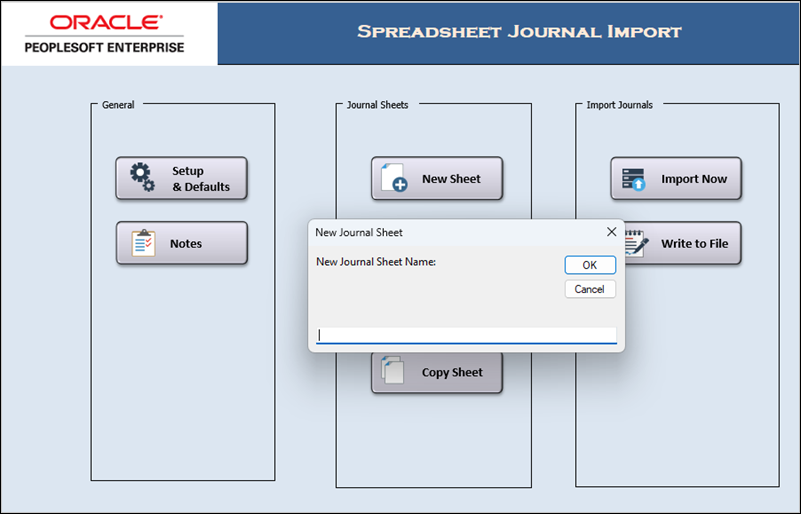
Enter a name for the sheet in the New Journal Sheet Name field.
This is the name for the spreadsheet but does not impact the name of the OAKS FIN Journal.
Click OK.
A new journal sheet displays with Header and Line control buttons.
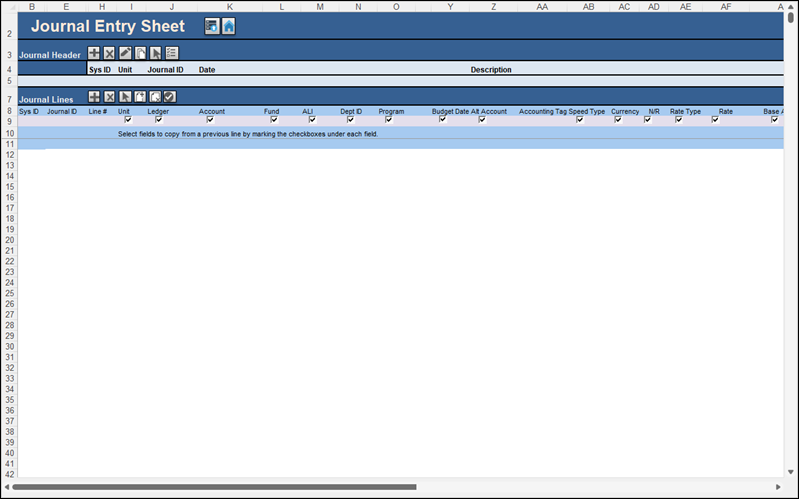
Step-by-step instructions for Creating Spreadsheet Journal Entries are covered in the next topic. Below is an overview of the Journal Sheets page, its various fields, and some things to know going into the creation of these pages.
The Journal Sheets page contains two main sections:
Header - The information entered in the Header section uniquely identifies an agency‘s journal. This includes data such as the Journal ID which is a string of up to 10 alphanumeric characters. This uniquely identifies the journal. The journal header also contains buttons (on row 5) to add, delete, or copy journal header information.
Line - The information entered in the Lines section is the journal line information. Unit, Ledger, Account, ALI, Dept, and Amount are entered in this section. It contains buttons (on row 9) to add, delete, or copy journal lines information.
See the Reviewing and Uploading Spreadsheet Journal Entries topic for a description of each button.
Note the line numbers listed in the spreadsheet. Each line represents a line that will be created in the journal.
A blank line separates the journal lines from the ChartFields. It is added the first time a journal line is added. This line must remain blank. A blank line also separates journals if multiple journals are added to the same spreadsheet.
OAKS FIN automatically populates the Journal ID in the first column of every line item added. The spreadsheet also displays a sequential line number for every line added.
Double-entry journals are required by OAKS FIN and the amounts on both sides of the journal must balance. For the journal entries created, the debits must equal the credits. Debits should be entered as positive numbers (e.g., 500) and credits as negative numbers (e.g., -500).
Once the journal spreadsheet is completed, the file is uploaded. A GL Journal Log is created in this process. The log provides a list of the errors that are created in the journal spreadsheet. Each agency may use this file differently. Best practice is to check it and immediately correct the errors.
Once uploaded into OAKS FIN, the agency GL approver edits and budget checks the journals. If the approver finds errors in the spreadsheet journal, the spreadsheet must be corrected and re-uploaded.
Step-by-step instructions for Creating Spreadsheet Journal Entries are covered in the next topic.