Revised: 09/15/2022
This process is used to create regularly recurring bills. Mostly this is used to split a large amount into equal installment payments or to charge the same amount on an ongoing basis -- monthly, quarterly, or annually.
Recurring bills are produced on the basis of the Cycle ID field. The cycle specifies when each bill should be produced. For the Cycle ID of “MTH-15-7-R,” the “MTH-15” indicates that the bill is produced each month on the 15th. The “7” indicates that the bill is created seven calendar days prior to the invoice date (to provide time for it to be reviewed prior to it being sent to customer). The “R” indicates “recurring”. Details on options are listed in the OAKS FIN Billing Cycle IDs topic.
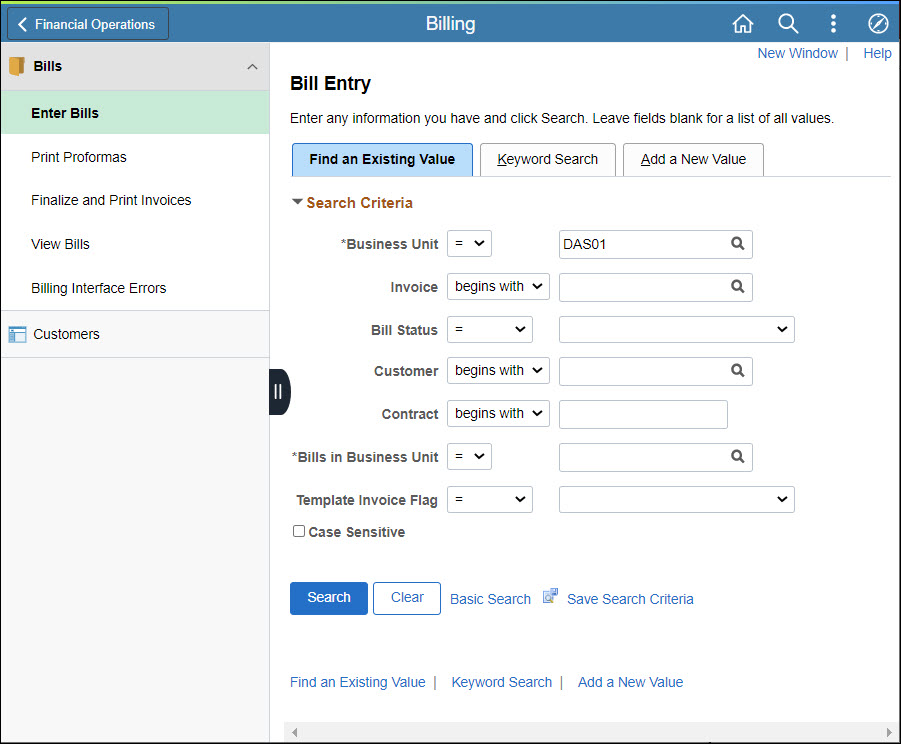
Click the Add a New Value tab.
The Add a New Value page displays.

Verify or edit the ID of the agency owning this bill in the Business Unit field.
This field defaults to local agency.
Enter the Invoice number according to agency-determined policy or leave "Next" if agency rules allow OAKS FIN to generate an ID.
When manually assigning an ID, a maximum of 10 characters may be used.
Enter or select the Bill Type Identifier.
Enter or select the Customer.
Click Add.
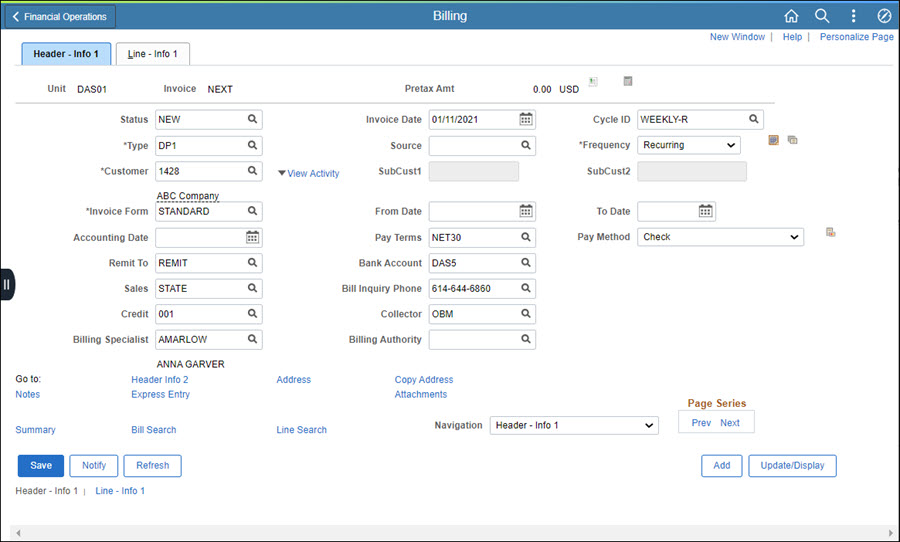
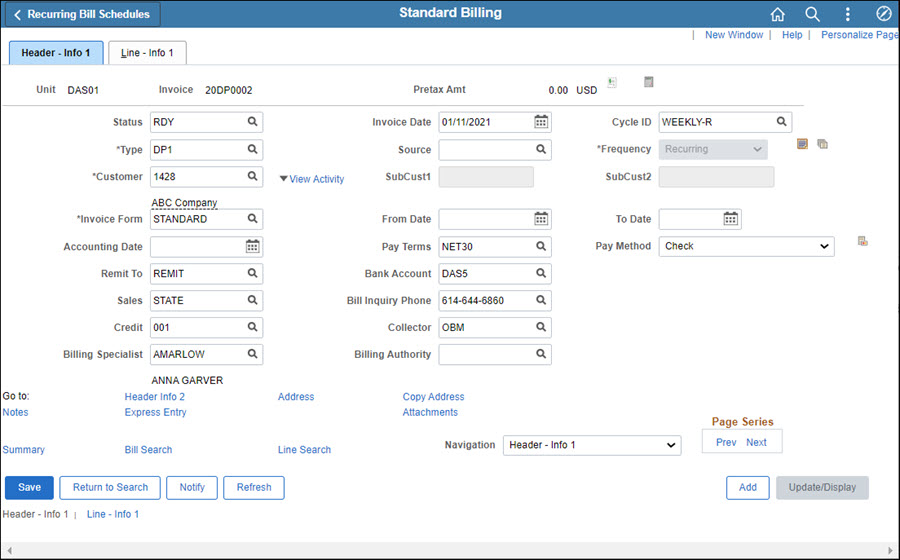
Enter the date that should be printed on the invoice in the Invoice Date field.
If a date is not entered, OAKS FIN uses the current date.
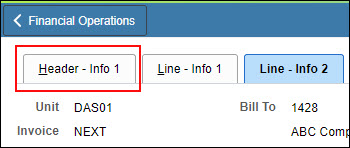
Select a Cycle ID.
Recurring bills MUST have an "R" at the end of the Cycle ID.
Select "Recurring" as the Frequency for the bill.
Review the Pay Terms field and edit if necessary.
This field defines when the bill is due. The default is "Net30" (days).
Verify that the name below the Billing Specialist field is the person to be contacted if there are any questions regarding the bill.
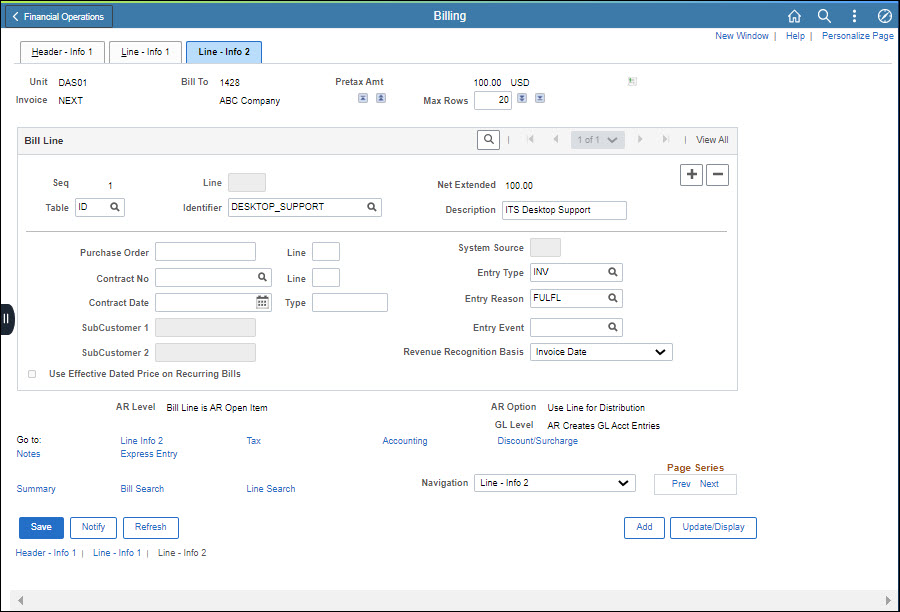
Click the Line – Info 1 tab.
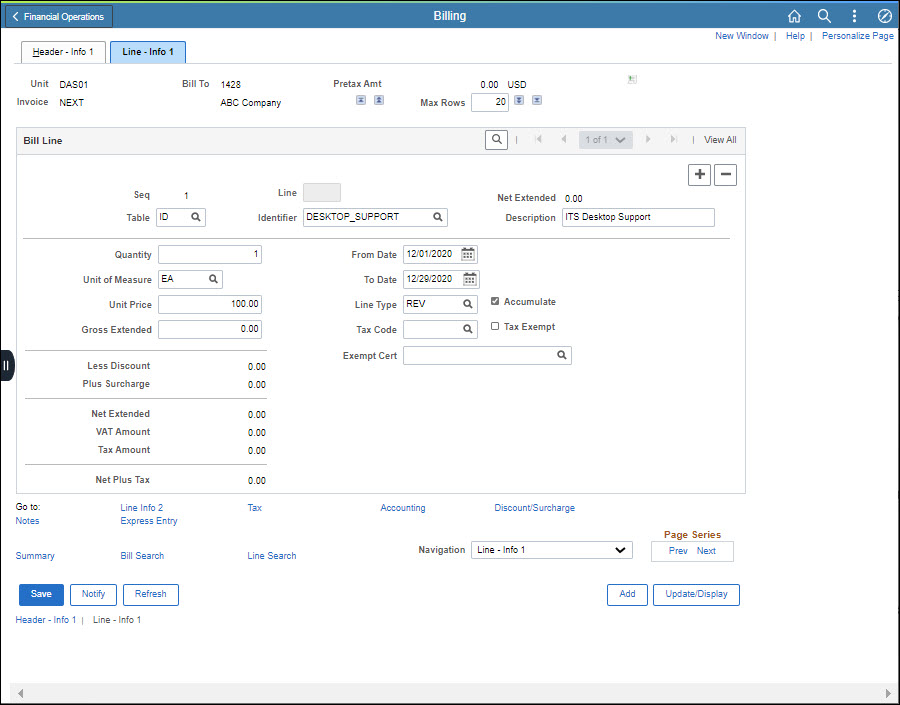
Enter "ID" in the Table field.
Select the agency-defined change code ID in the Identifier field.
Selecting the Identifier automatically populates the Description field and sometimes the Unit of Measure and Unit Price.
If necessary, select a Unit of Measure by clicking on the Look Up Unit of Measure icon.
Enter the quantity of goods in the Quantity field.
Click the Line - Info 2Line - Info 2 link.
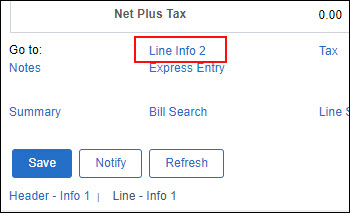
The Line Info 2 page displays.
Click the Look up Entry Type icon and choose the appropriate Entry Type. The choices are:
INV = Invoice (new bill)
CR = Credit (adjustment bill)
ISTV = ISTV Invoice
For an ISTV, the Finalize and Print process prepares the invoice for printing. The ISTV will be ready to print from OAKS FIN Accounts Receivable the following day after the nightly processes have run.
If desired, it can be printed immediately by following the steps in the topics Changing Bill Status and Finalizing and Printing Invoices. However, it will not be posted to Accounts Receivable until the following day.
ISTCR = ISTV Credit
Select the Entry Reason.
The Entry Reason is used to determine the correct accounting string. Entry Reasons are defined by each agency.
To add another line item, click the Add a new row at row 1; and, enter the second line item following steps above.
Click the Header – Info 1Header – Info 1 tab.
The Header - Info 1 page displays.
Click Save.

Select a date for the recurring bill to start in the Start Date field.
Select a date for the recurring bill to cease in the End Date field.
The End Date can be modified later.
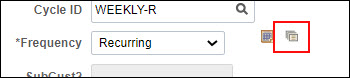
If desired, select the Pre-Assign Invoice Numbers checkbox.
After selecting the Pre-Assign Invoice Numbers checkbox, OAKS FIN creates the invoice numbers for all future bills listed in the bill schedule. This creates a sequential numbering of invoices for your agency and allows easy identification of bills that are associated with the recurring bill schedule. However, this may cause gaps when reporting on invoice IDs in Billing and Item IDs in AR, because the system reserves the numbers, but does not generate future recurring bills until the generate date.
Otherwise, invoice number will be assigned at the time the recurring bill is generated later.
Click the Generate Rev. Rec. BillsGenerate Rev. Rec. Bills icon to create schedule bill lines.
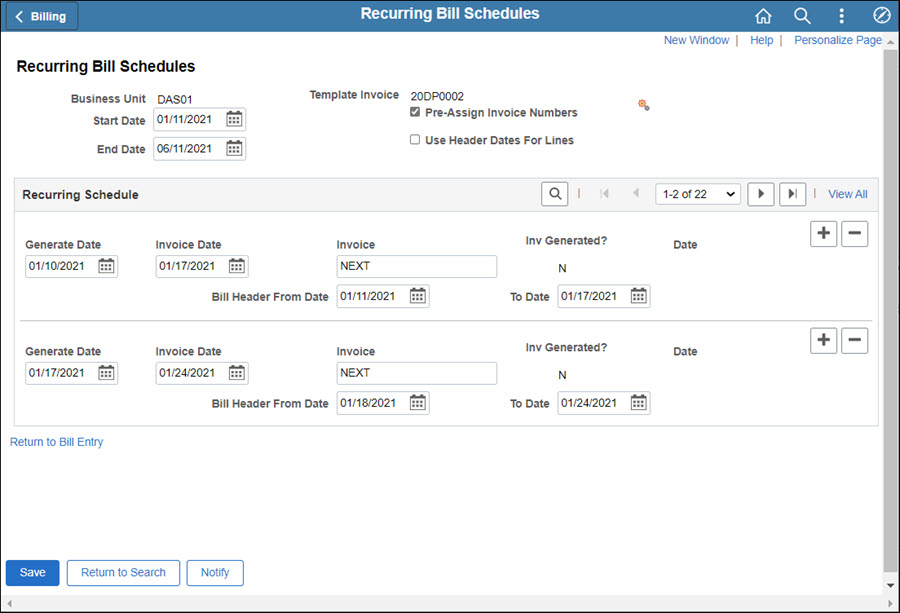
Review the Recurring Schedule for accuracy.
Click Save.
Click the Return to Bill Entry link.
The Header - Info 1 page displays.
Change the Status to RDY.
Click Save.
If desired, click the SummarySummary
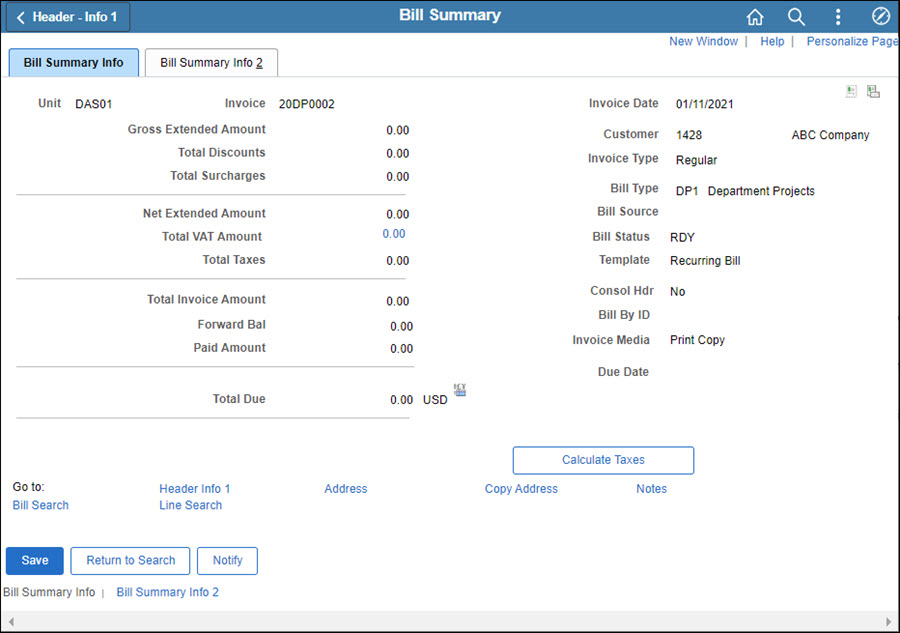
Some of the key fields are:
Invoice - Displays the invoice number for this bill.
Invoice Date - Shows the date the customer is invoiced.
Customer - Shows the person, company, or agency to whom you are sending this bill.
Bill Type - Shows the type you selected, which allows similar bills to be grouped.
Bill Status - Displays the current status of the bill, such as Ready (RDY).
Total Due - Shows you how much the customer owes on this particular bill.